This week’s maker is our own Makers Lab designer, Scott Drapeau. Let’s take a closer look at what Scott has been working on.
Q: What did you make?
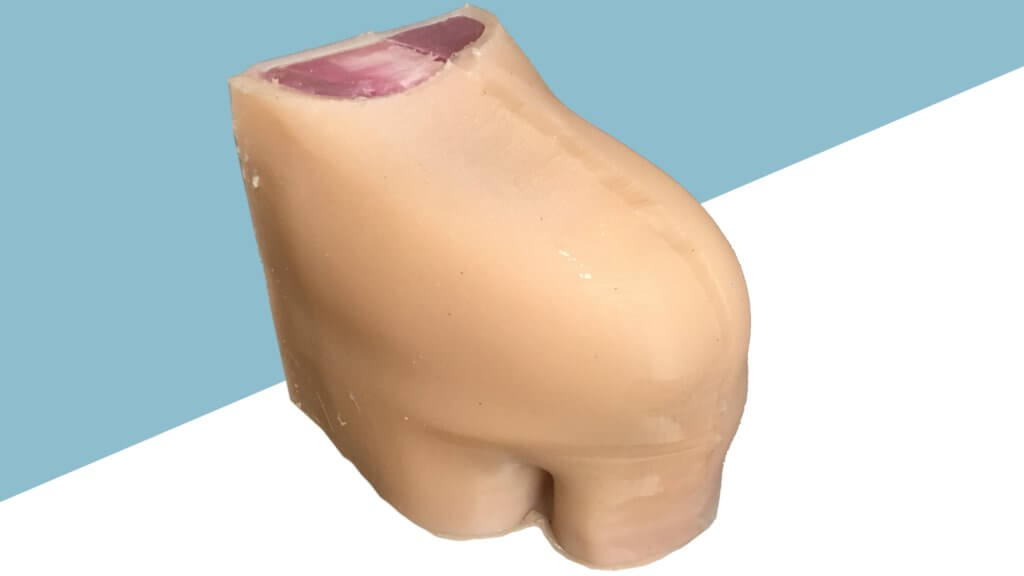
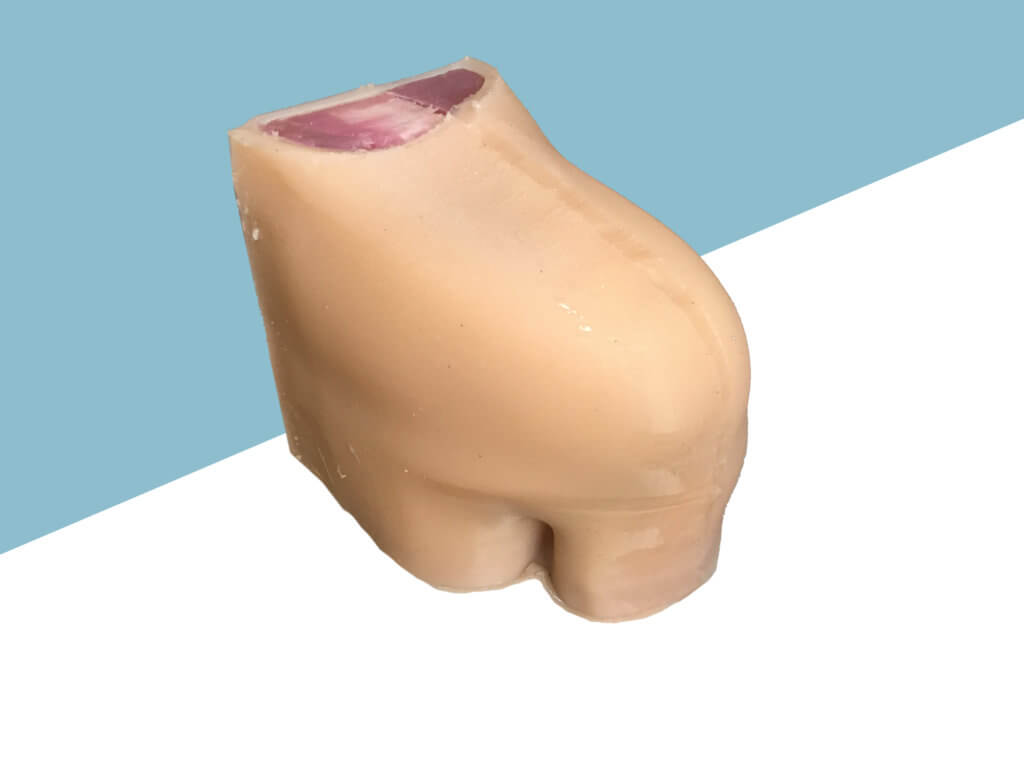
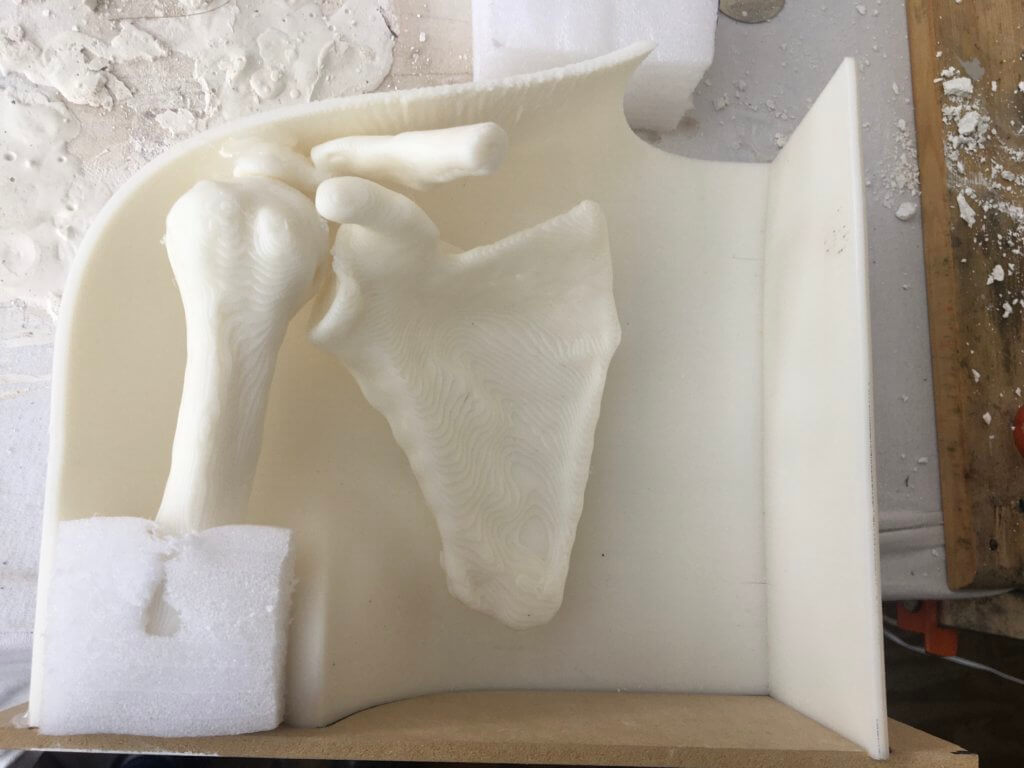
I made a glenohumeral joint inside of a 1:1 scale shoulder model, covered in skin, with internal bones and flesh. This project is based on a prototype phantom on the PubMed.gov website.
Q: Why did you want to make it?
Drs. Harmon and Klein of the Anatomy Lab approached the Makers Lab to see about the feasibility of producing a mock up of a glenohumeral joint that could be injected and aspirated with liquid. They wanted the end product to be a simulation model that could be reused, and when parts got overused and too old they could be switched out.
Q: What was your process?
I first spoke with Dr. Harmon, Dr. Klein, and Dylan Romero about if I could come up with a process for making a water tight silicone ball that could act as the soft part of the glenohumeral joint. We sketched ideas on paper and white board to start, then I moved onto solid modeling in Solidworks.
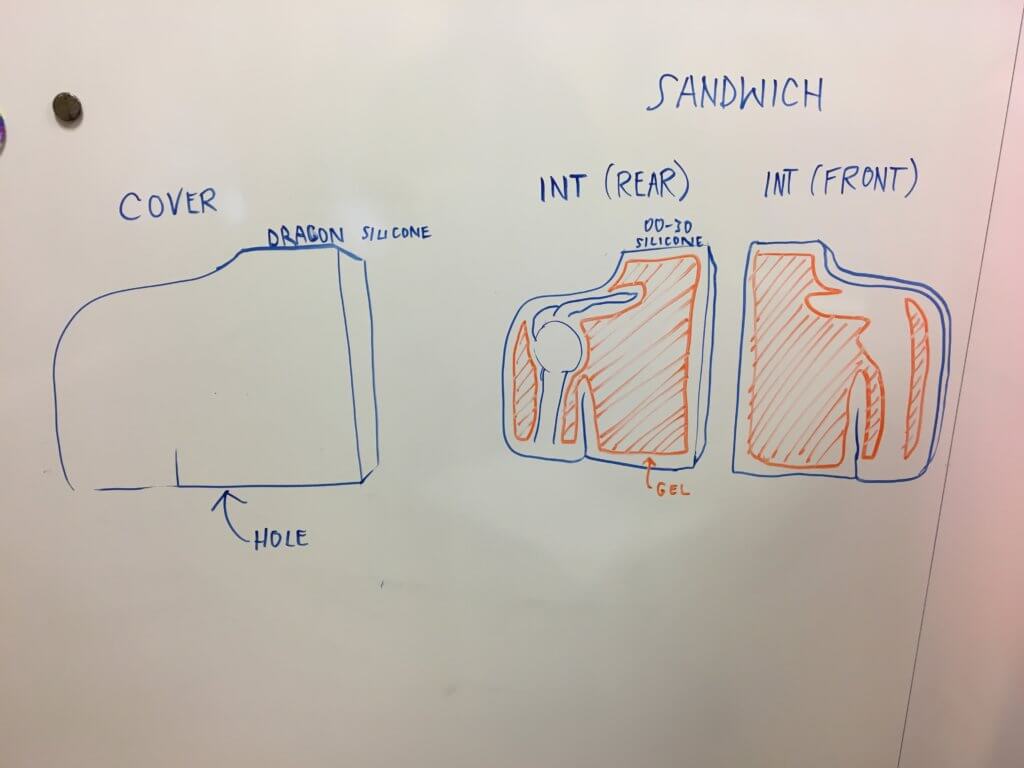
I printed a few different versions of the mold before I was satisfied, and then filled the mold with silicone. Once this cured I was able to remove it from the mold and test to see if it was water tight.

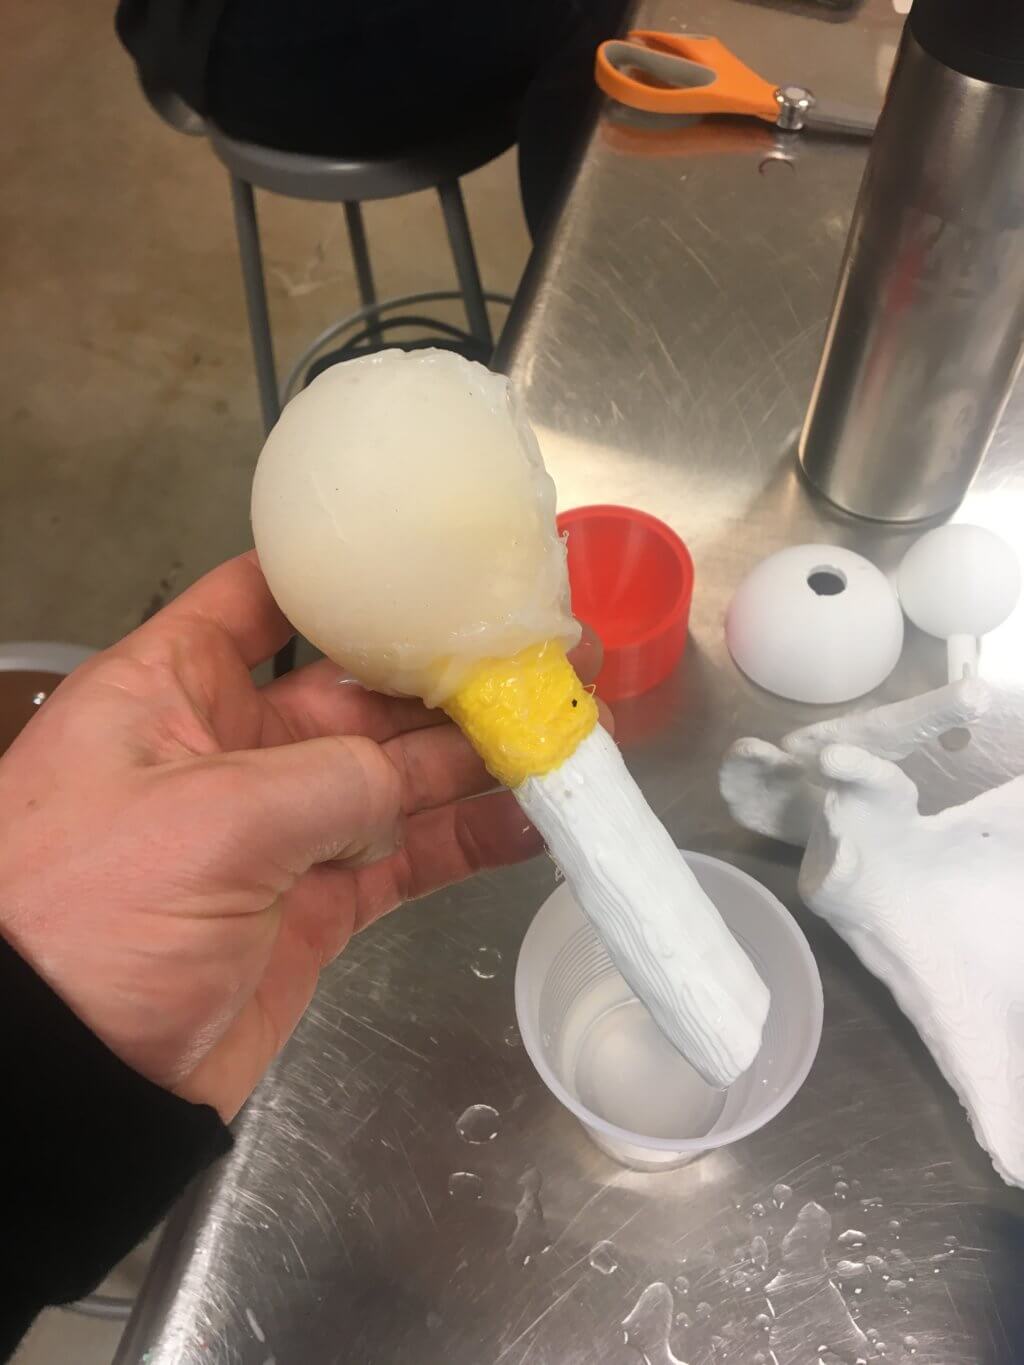
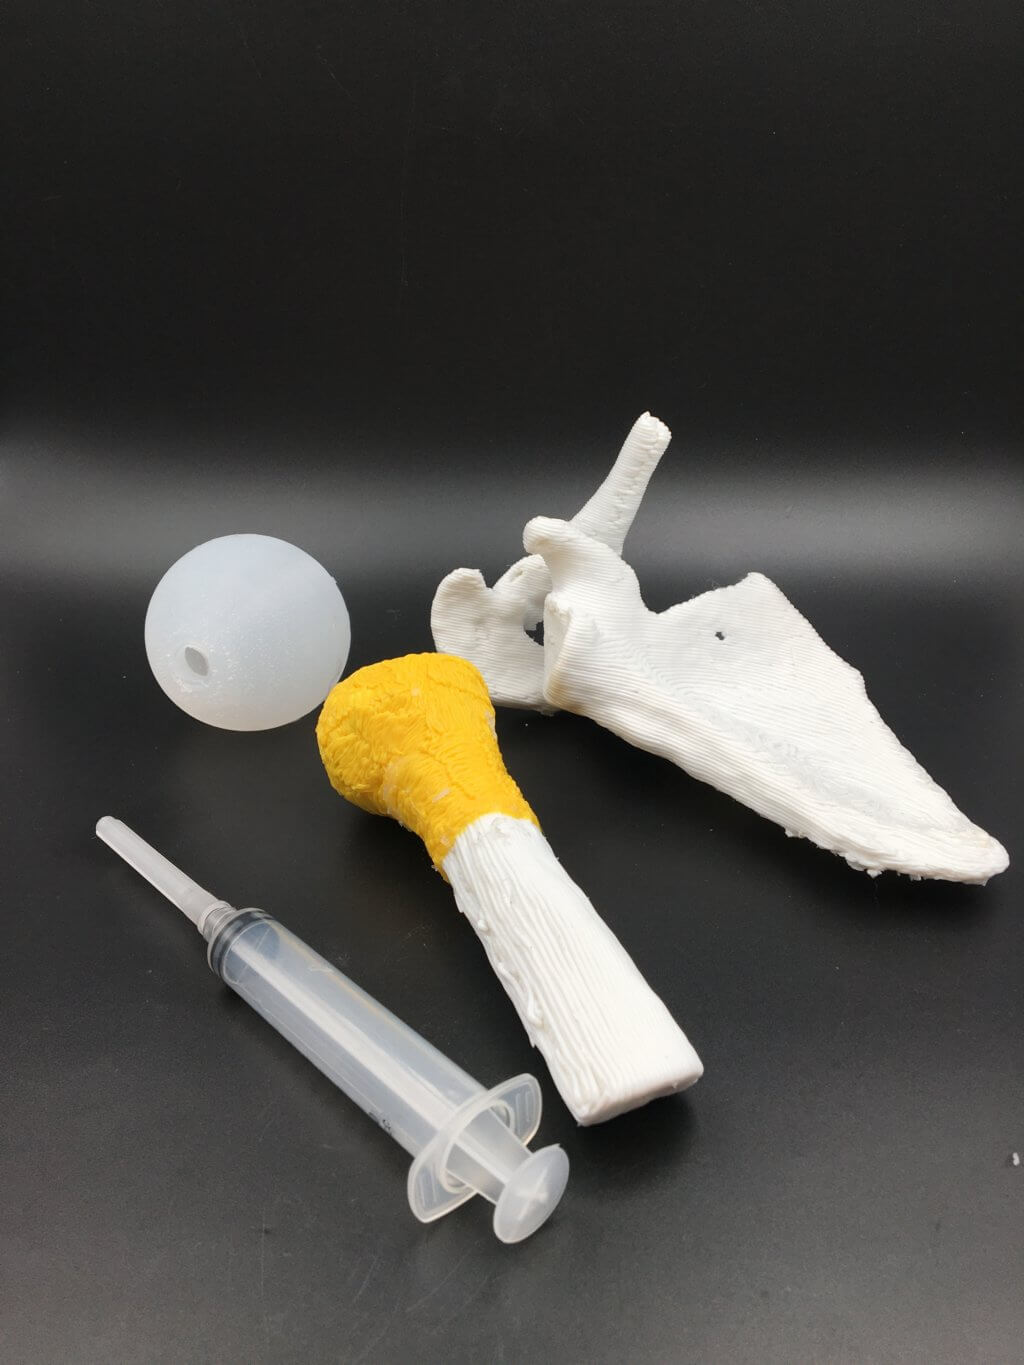
I printed the bones of the shoulder and arm and secured the silicone ball onto it with a nylon tie. Then I repeatedly injected 20cc’s of water into the ball with a syringe and checked for leaks each time. I casted about five different silicone balls before settling on something that functioned correctly.
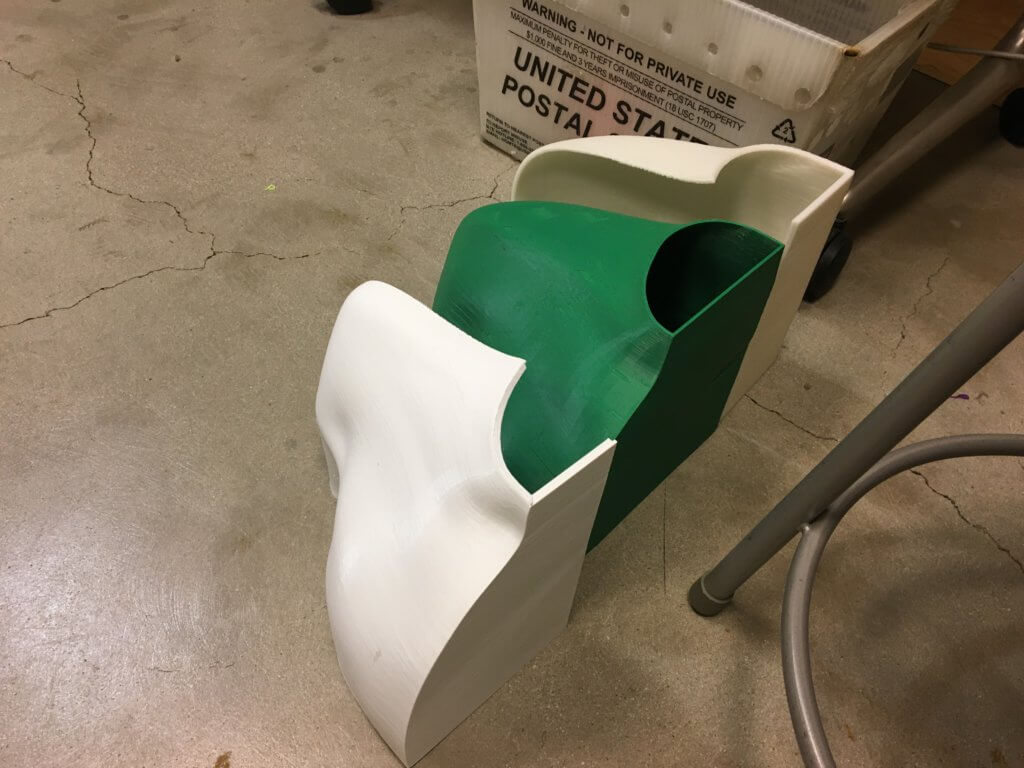
I modeled a life-size outer shoulder in Solidworks, and referenced the bone files as a guide. I then printed the entire shoulder in two halves, with the intention of sandwiching a smaller version of the shoulder inside (the smaller one is called Mr. Green).
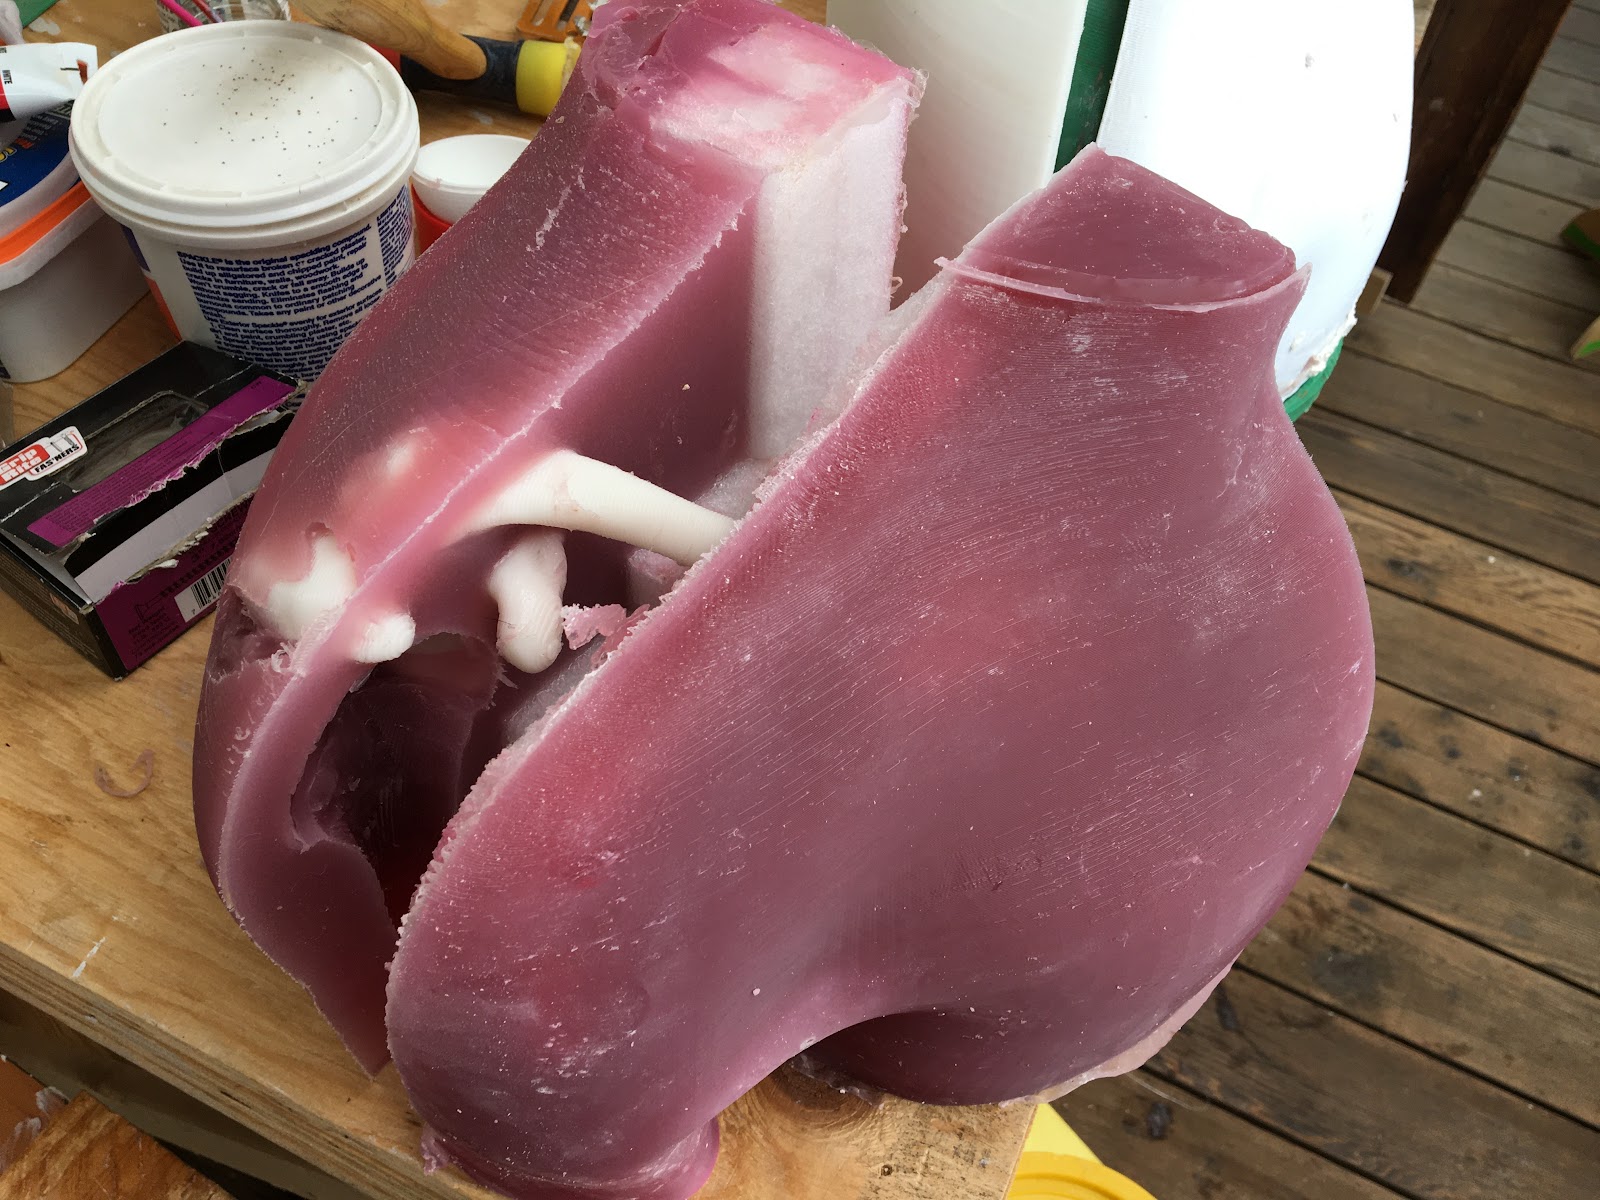
I placed the bones inside of the back half of the mold, secured in place with hot wax. I then filled in the large areas with packing foam, to take up space.
The rest of the mold was then filled with a maroonish silicone to emulate inner flesh and muscle. I did the same process to the front mold. Once both cured I took out the models and sandwiched them together, awaiting outerskin.
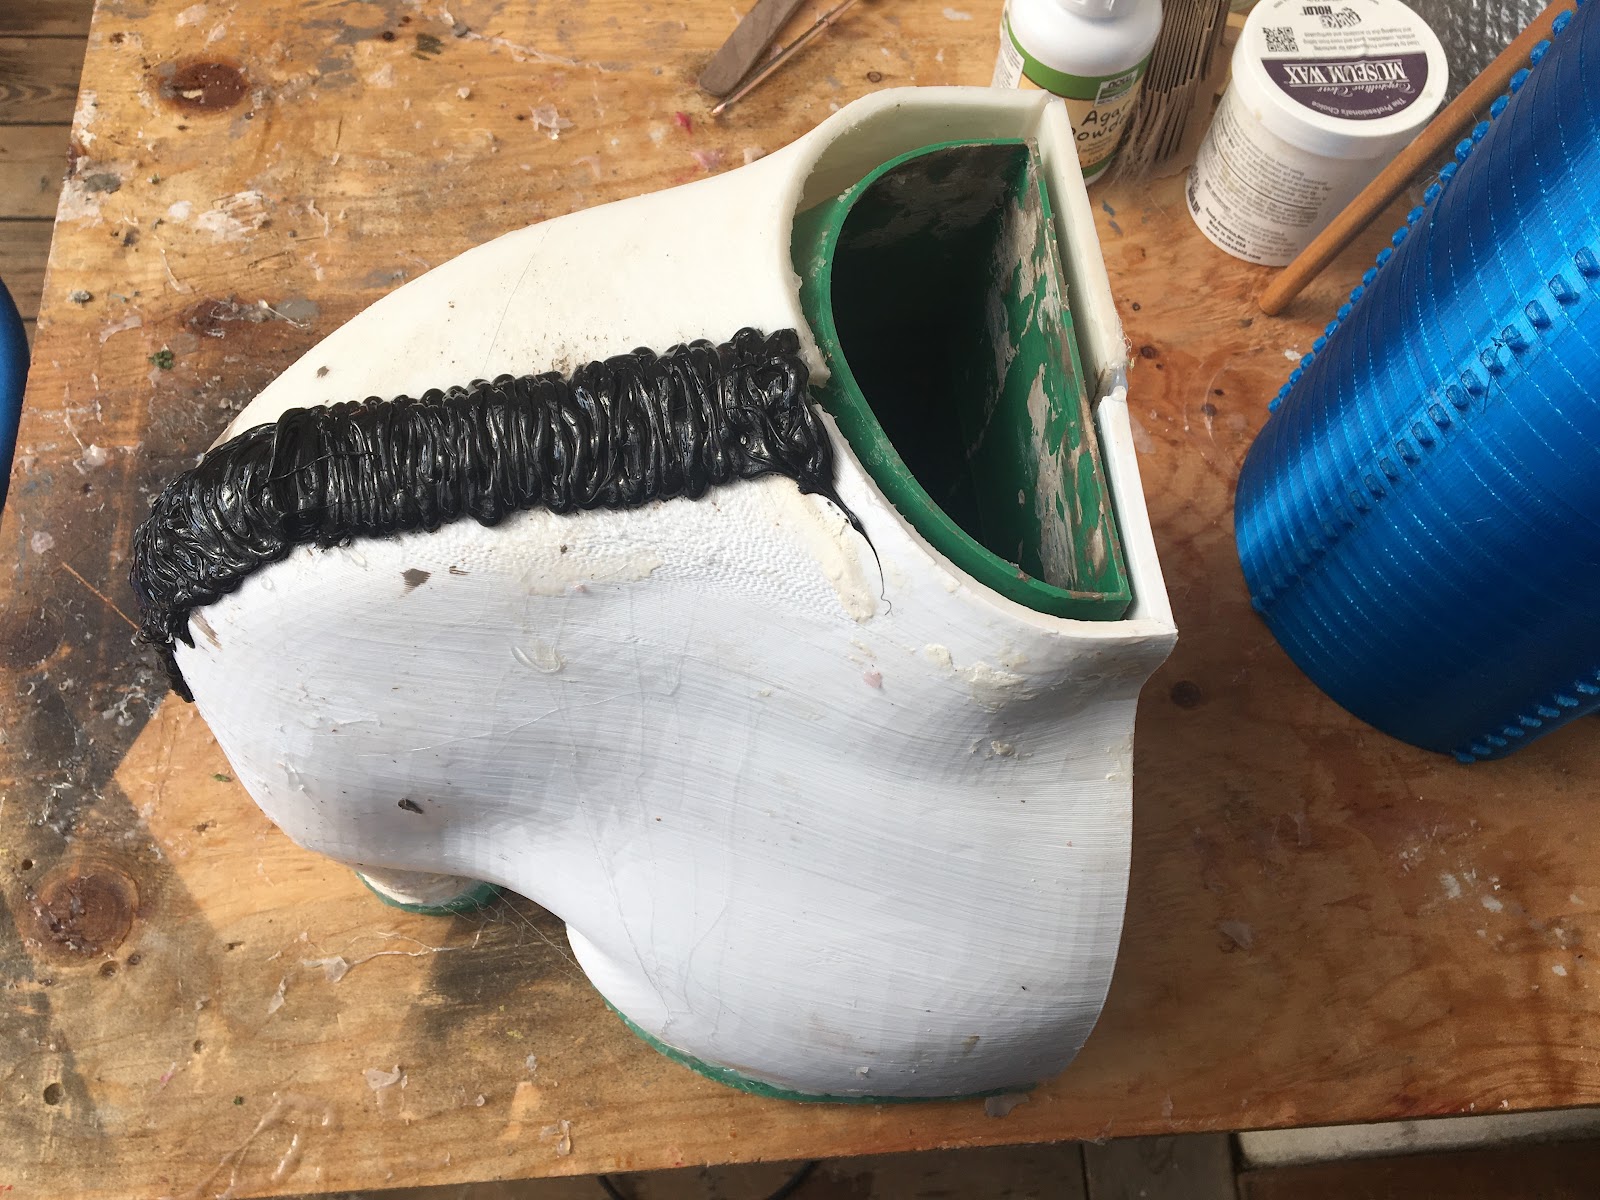
The last step was putting the 3-piece mold together and filling it with silicone. Once cured I pulled skin out, and then stretched it over my inner models.
Q: What was the hardest part of the process?
The hardest process was controlling shape consistency on large-scale mold shells, one of which I had to finagle to make work. This is a result of printing very large items on our Taz6, but with extremely thin walls. Note the clay residue on the green part of the mold, which is a result of a failed attempt of using clay and plaster to create a shell. Learning through mistakes is what we do in the Makers Lab.
Q: What has been your favorite part of the process?
Pulling well casted silicone out of molds is an extremely satisfying feeling. The sound it makes is also quite nice to hear.
Q: How did this help make you a better staff member?
The more I work on design projects the better of a designer I become. Discovering new techniques and teaching our patrons is a wonderful, reciprocal process.
Q: What do you want to make next?
I’ve been working with Mary Jane Paras with the Department of Anesthesia on this N95-type face mask sterilization container. The idea is to reuse the N95 masks as much as possible while keeping them clean and protected when not in use, but there is special emphasis on not touching the mask with your hands for removing or applying the mask.
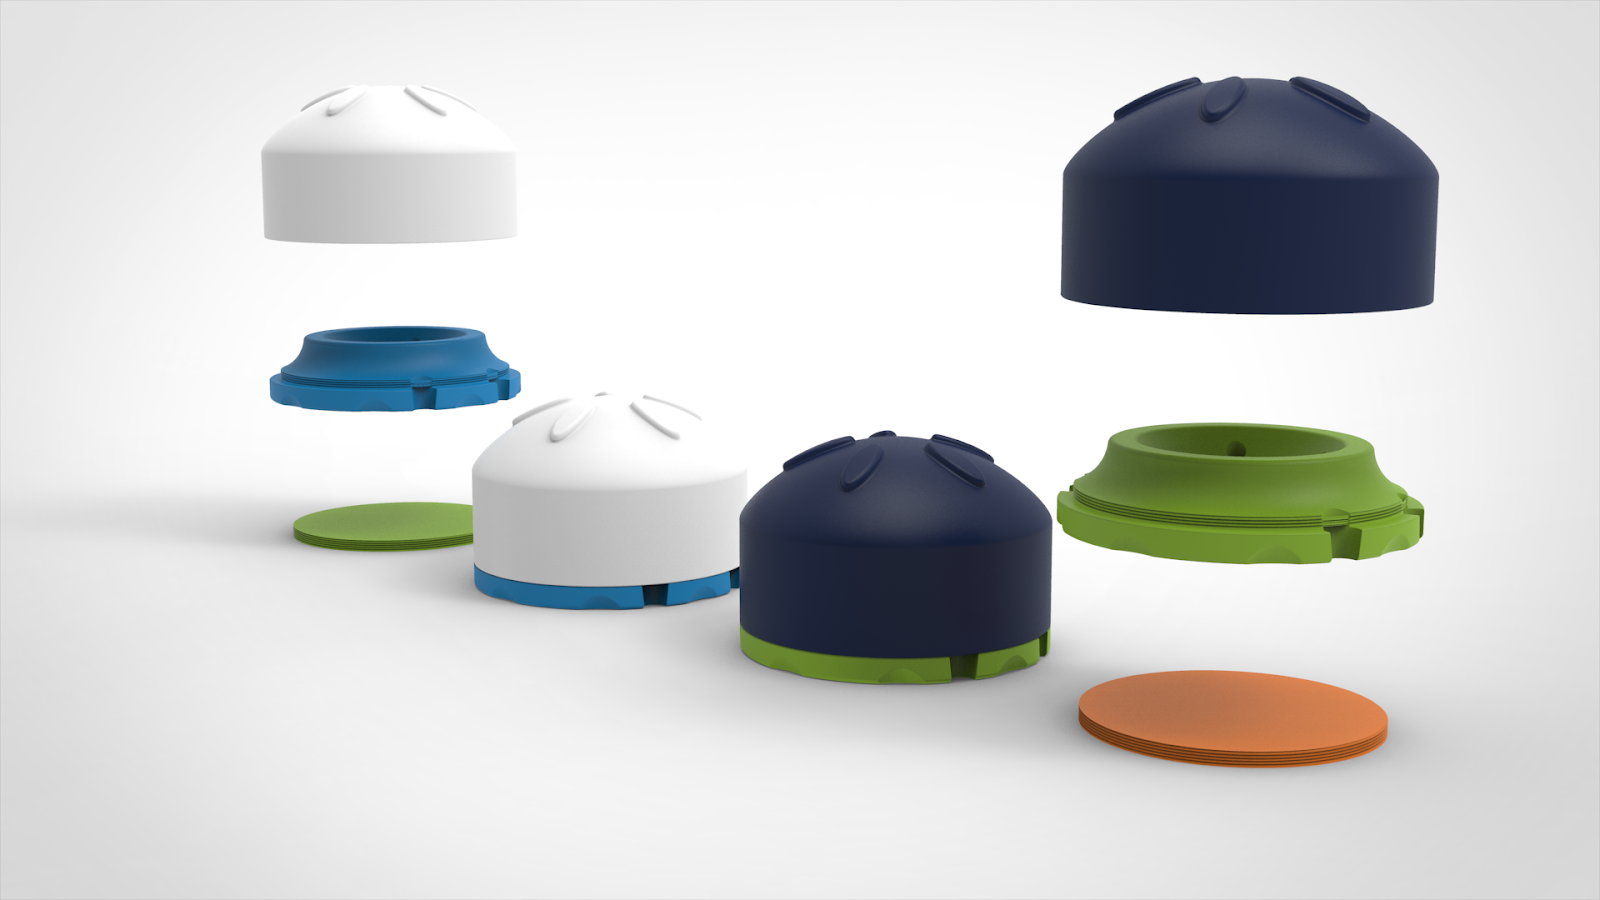

There is a compartment at the bottom for silica packs to be switched out as needed, and a keychain/name-tag loop on the side for identification.
After this I have another project to work on for Dr. Harmon to make a spinal column under synthetic skin and flesh. This is a very similar concept to that of what Dr. Manuel Pardo did in the Makers Lab. More to come on that!