
Update 8/18/20 3D printed face shield files (STL) are now available on the NIH 3D Print Exchange. Additional information from the “3D Printed Face Shield Repository” has been consolidated into this post. Please view the sections below for updated information.
This post provides information about the UCSF face shield project. The most current face shield model is provided below, as well as a background, production workflow, and more resources. The face shield project is one of many PPE-related projects being worked on by the UCSF ORIF (Organized, Rapid, Intelligent Fabrication) team in response to the COVID-19 pandemic.
Background
One of the challenges UCSF hospitals are facing during the COVID-19 pandemic is the shortage of masks, face shields and other forms of personal protective equipment (PPE). Currently, UCSF needs 300+ face shields per day. 3D printing and other additive manufacturing technologies are being used to fill the gaps in the PPE supply chain.
A coordinated effort is needed to supply the necessary equipment and ensure that equipment is approved for use in the healthcare environment. On Thursday, March 19, UCSF Clinical Technologies reached out to the Makers Lab to start manufacturing face shields for UCSF and Bay Area hospitals. After creating a model, workflow, and receiving approval from multiple UCSF departments, the UCSF Library is now being used to 3D print, wash, and assemble more than 300 face shields a day. All of the Makers Lab’s 3D printers and others from the UCSF community are being used to 3D print the face shields.
Needs assessment
Evaluating needs was the first and foremost goal of the project, rather than directing efforts towards manufacturing equipment that may not be compatible for use in the UCSF hospital setting. Based on conversation with UCSF Clinical Technologies, it was determined that face shields were in high demand and the most feasible PPE items for production using 3D printing.
Currently, UCSF face shield production will comply with FDA guidance regarding medical face masks and respirators.
“FDA recognizes that, when alternatives, such as FDA-cleared masks or respirators, are unavailable, individuals, including healthcare professionals, might improvise PPE. FDA does not intend to object to individuals’ distribution and use of improvised PPE when no alternatives, such as FDA-cleared masks or respirators, are available.”
– U.S. Food and Drug Administration
The face shield
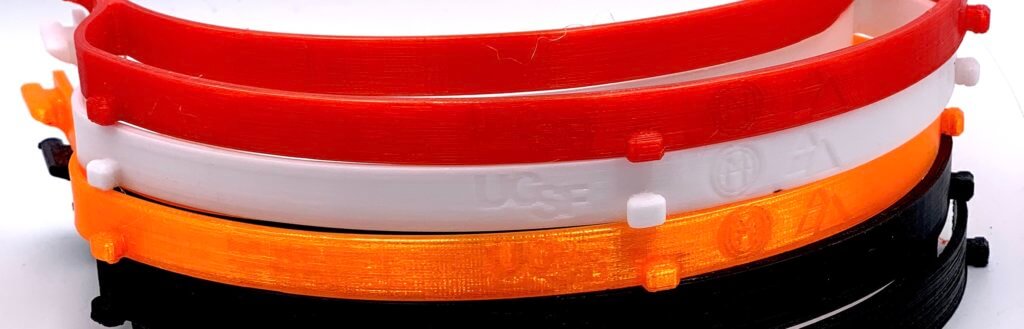
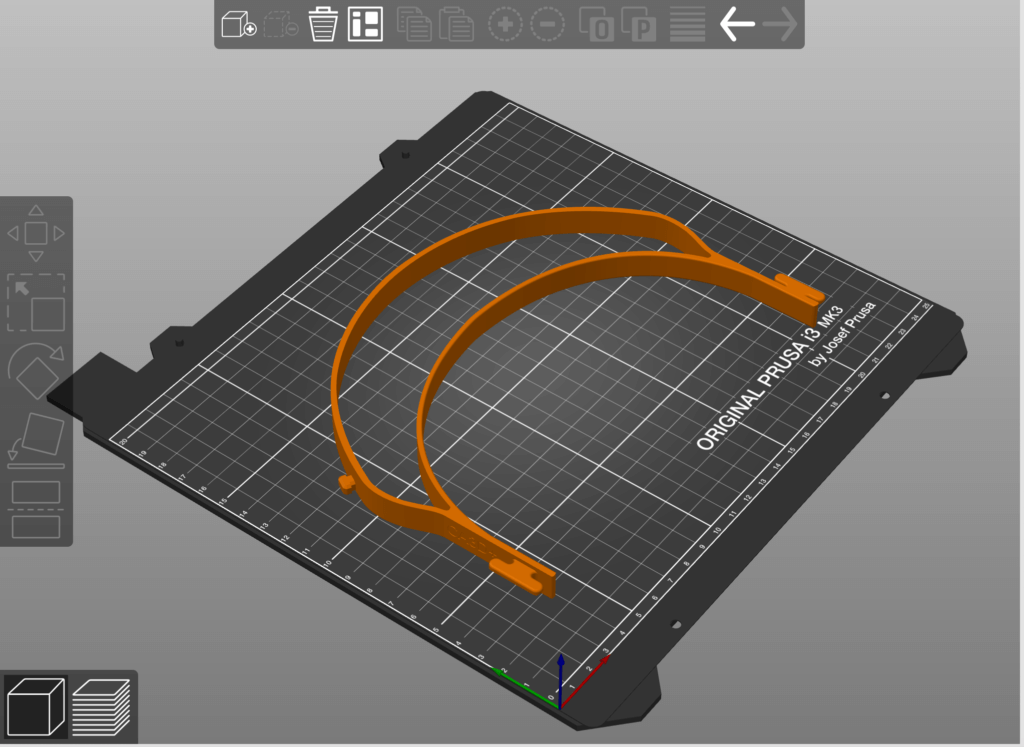
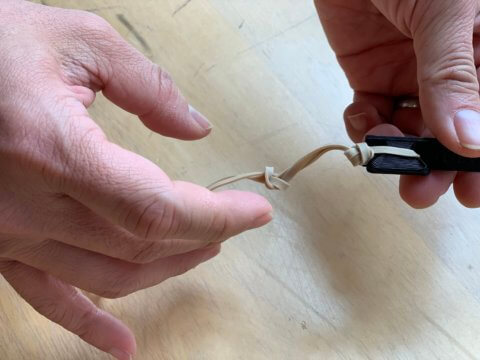
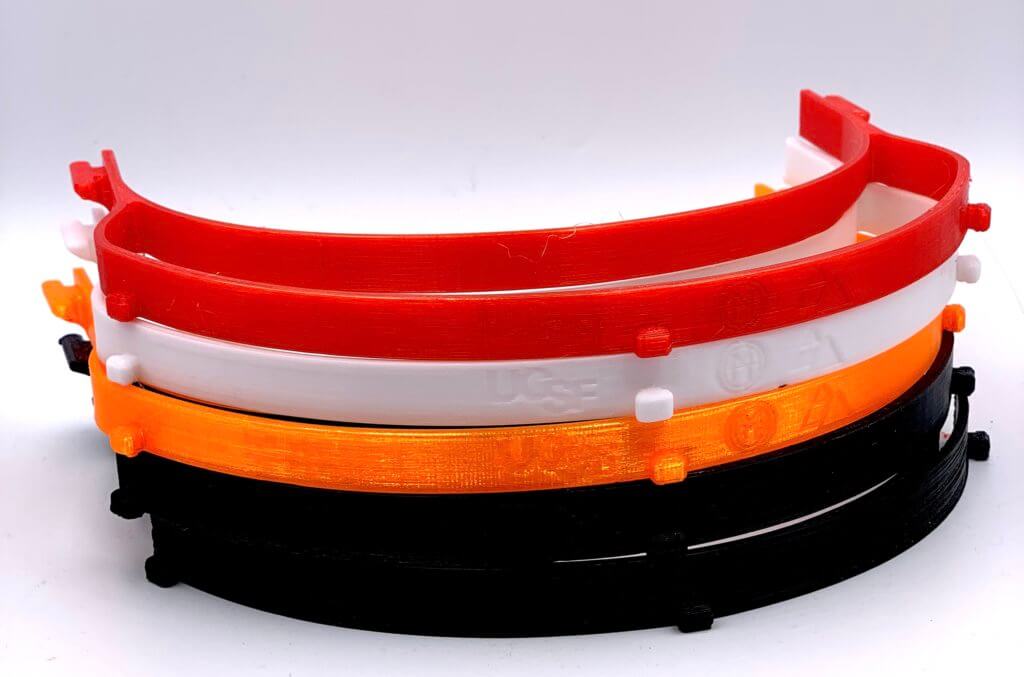
The design for the UCSF 3D Shield was inspired by the Prusa RC2 model. While a very robust model, assembly of the RC2 face shield requires the shield to be either laser-cut or machined out of a PETG (polyethylene terephthalate glycol) material. Unfortunately PETG supply is scarce at this time. Additionally, the start-up costs associated with laser cutters and other machining alternatives, such as CNC routers, are higher. Instead, the UCSF face shield uses an 8.5”x11” transparency sheet which is readily available and interlinked rubber bands, which are replaceable as needed and easier to source than buttonhole elastic.
In order to fully utilize the 3D printers at the UCSF community’s disposal, modifications were made so that the shield frame 3D prints faster and can hold the transparency sheet securely. In order to achieve the optimal design, the shield frame model underwent the following iterations:
- Iteration 1: Attachments were changed to securely fit a piece of transparency film.
- Iteration 2: Inner part of the shield frame was recreated to have a solid structure instead of hexagonal spacings. This helped improve print quality and reduce print times.
- Iteration 3: Shortening the height of the entire shield frame drastically decreased print time.
- Iteration 4: Simplifying the shape and eliminating excess perimeters during the 3D printing process.
With PETG at $30/kg, each shield frame costs approximately $0.60 to produce. Each transparency shield is around $0.20/sheet, with each shield frame consisting of rubber bands at $0.05/rubber band.
Click the button below to view and download files:
Production process
3D Printing
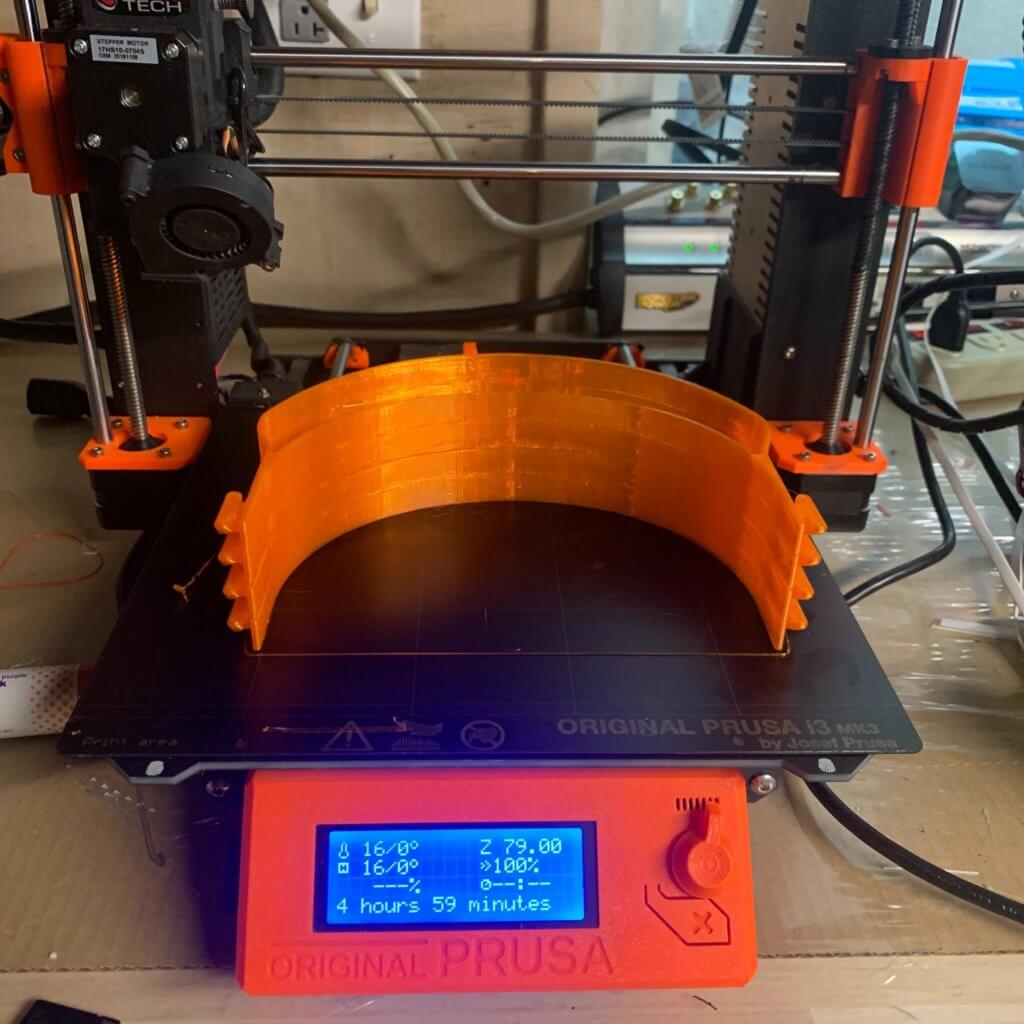
Production of the UCSF face shield is being achieved through continuous 3D printing in the UCSF Library. While the majority of prototype testing has been accomplished using LulzBot, Ultimaker, and Prusa 3D printers, other brands of 3D printers can also be used.
Print parameters are optimized for speed — 0.3mm layer heights on the Prusa with no support, with 20% gyroid infill, 2 perimeters. For LulzBot printers, use 0.35mm layer height, with no support, 20% grid infill, 2 perimeters. The thicker layers also help with PETG adhesion.
The UCSF face shield is printed with PETG. The increased flexibility is more comfortable than PLA (polylactic acid) for both revisions of the parts. PETG is also chemically resistant and recyclable. Alternative plastics include ABS, ASA, and Nylon.
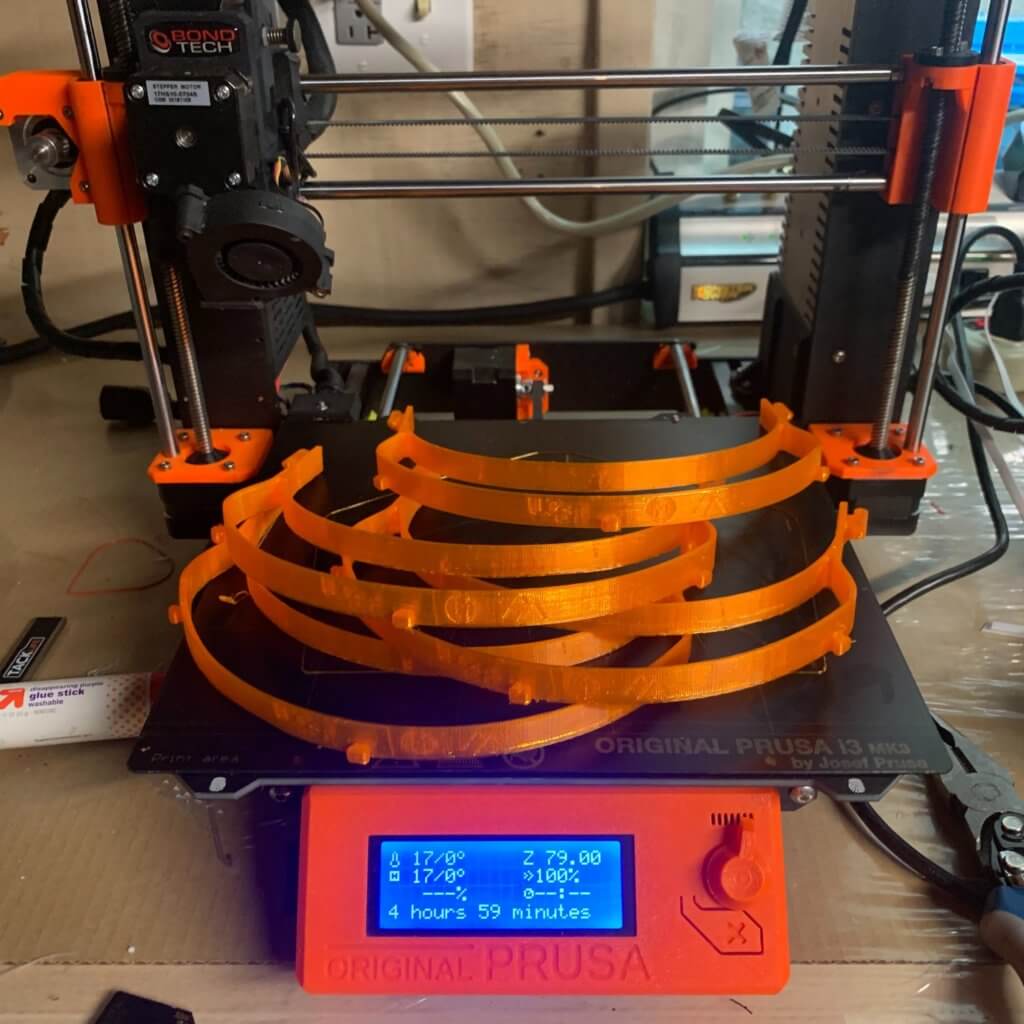
Stacking prints
“Stacking” refers to layering multiple shield frames within the same 3D print job with the help of support enforcers. Stacked prints improve printing efficiency and can be removed individually once the print is finished. As 3D printer build volumes vary, printing singular or nested versions of any model on your printer of choice is recommended before printing the stacked versions.
We developed stacked STLs that are optimized for printing at 0.3mm layer heights. We don’t see much benefit for multi-day prints, as our printers will be attended to daily. For more information on stacking, please refer to the following videos for Prusa Slicer and Cura.
Cleaning
Cleaning of 3D printed shield frames following CDC recommendations is required before the securing of 2-3 rubber bands to the back of each piece.
Assembly
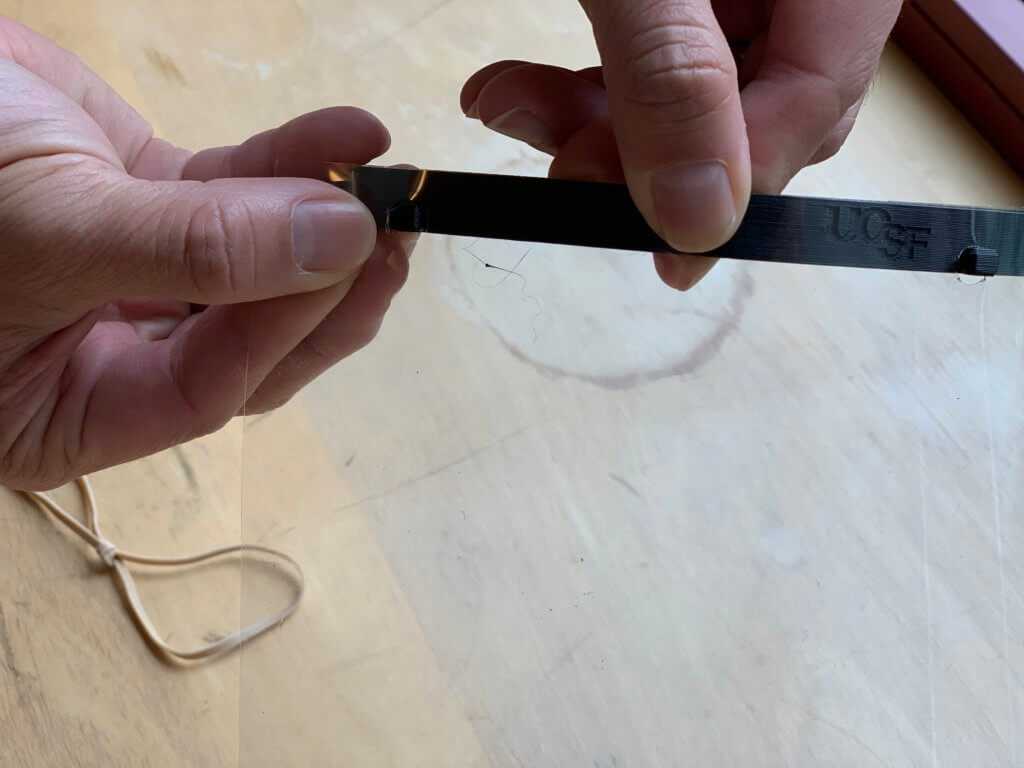
Use a transparency with a standard 3-hole punch to manually create holes for the attachment points on the shield frame. At UCSF, we are have the transparency drilled by the UCSF Documents and Media team.
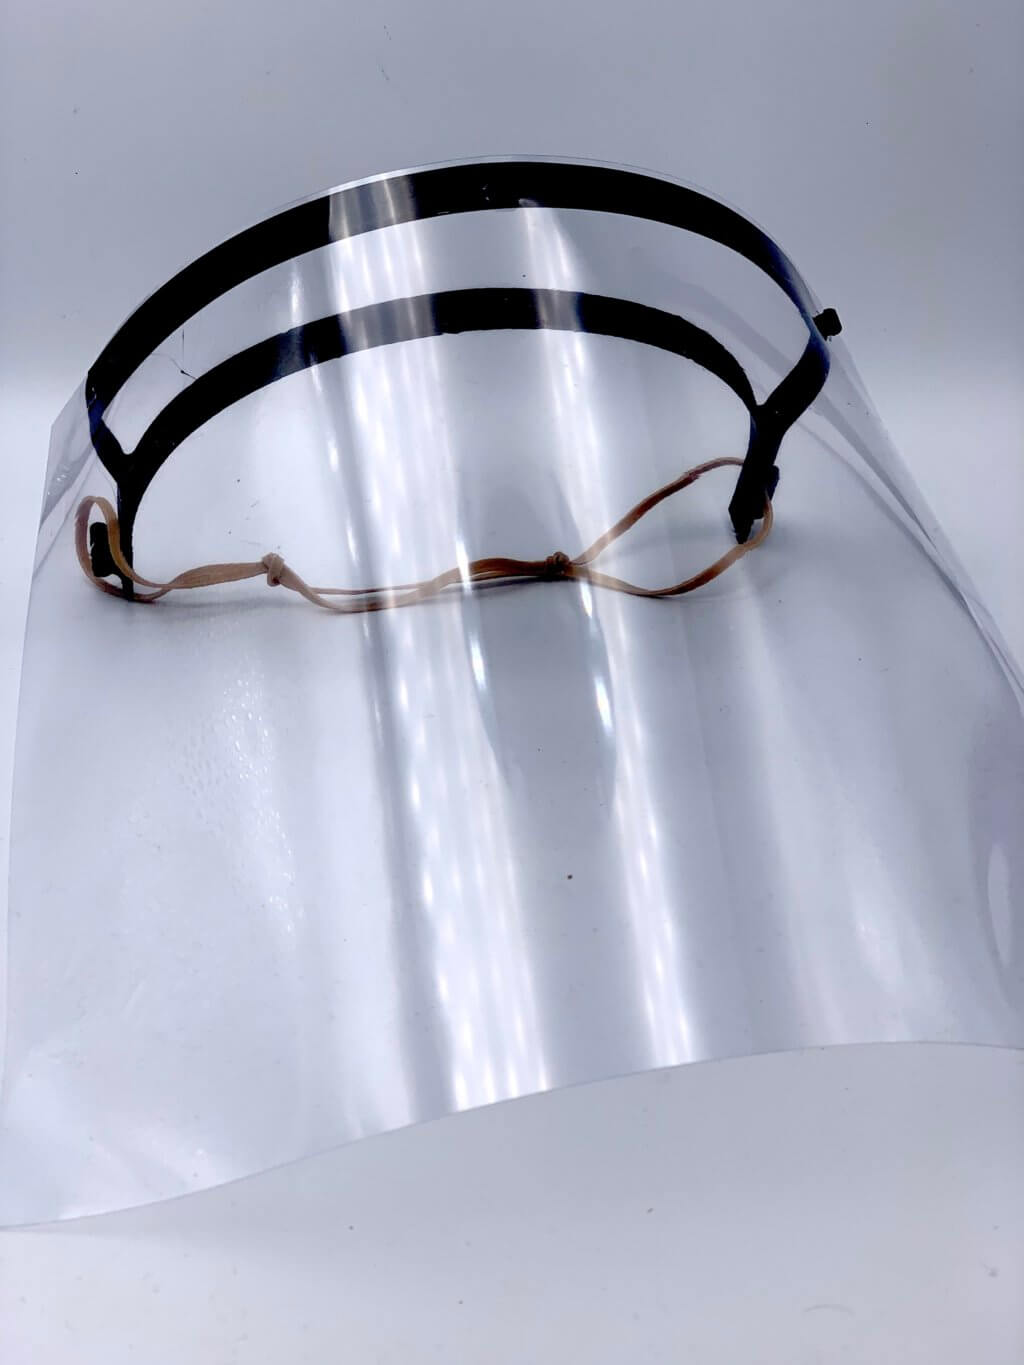
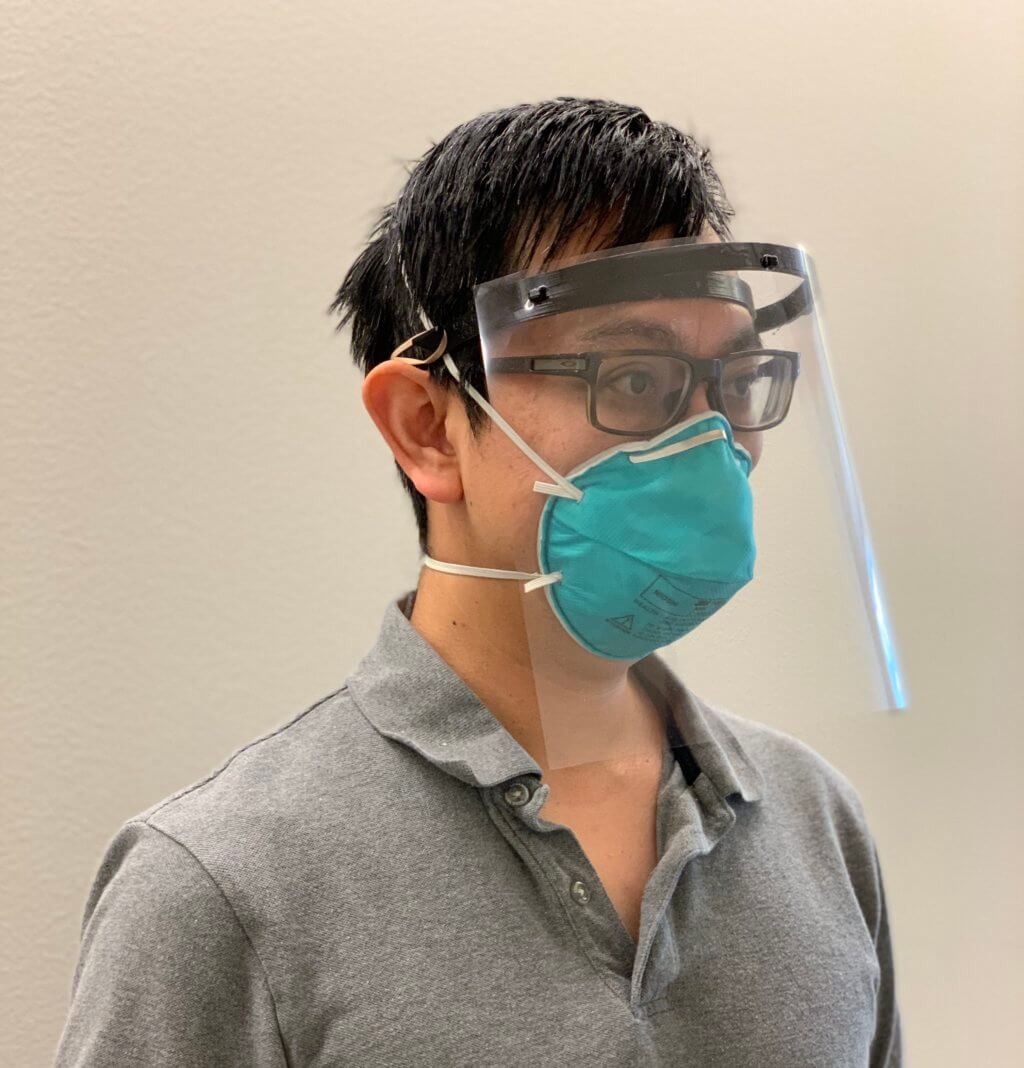
Transparency film are attached to shield frame after arriving at the hospital, as shown in the image below.
Interlinked rubber bands form the straps and are attached to both ends of the the shield frame as shown in the image below.
Assembled shield frames are bagged and placed in sterile totes with transparency sheets for delivery.
Questions & Information
Contact the Makers Lab for general inquiries or questions about the 3D printed face shield.
Support the face shield project by contributing to our crowdfund campaign.