This week’s maker is Michael Mayes, MS, ATC, a certified athletic trainer with UCSF Sports Medicine.
Q: What did you make?
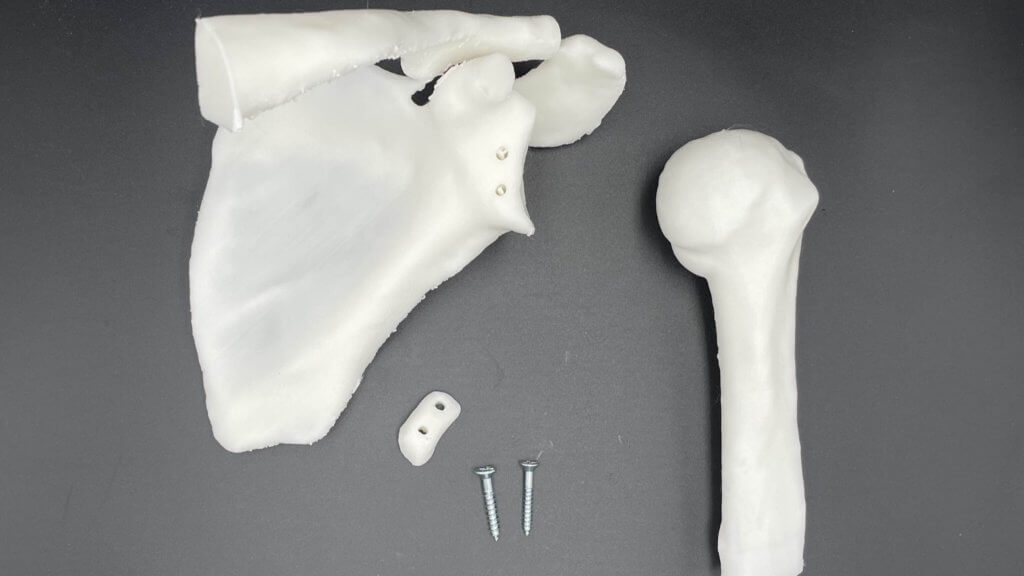
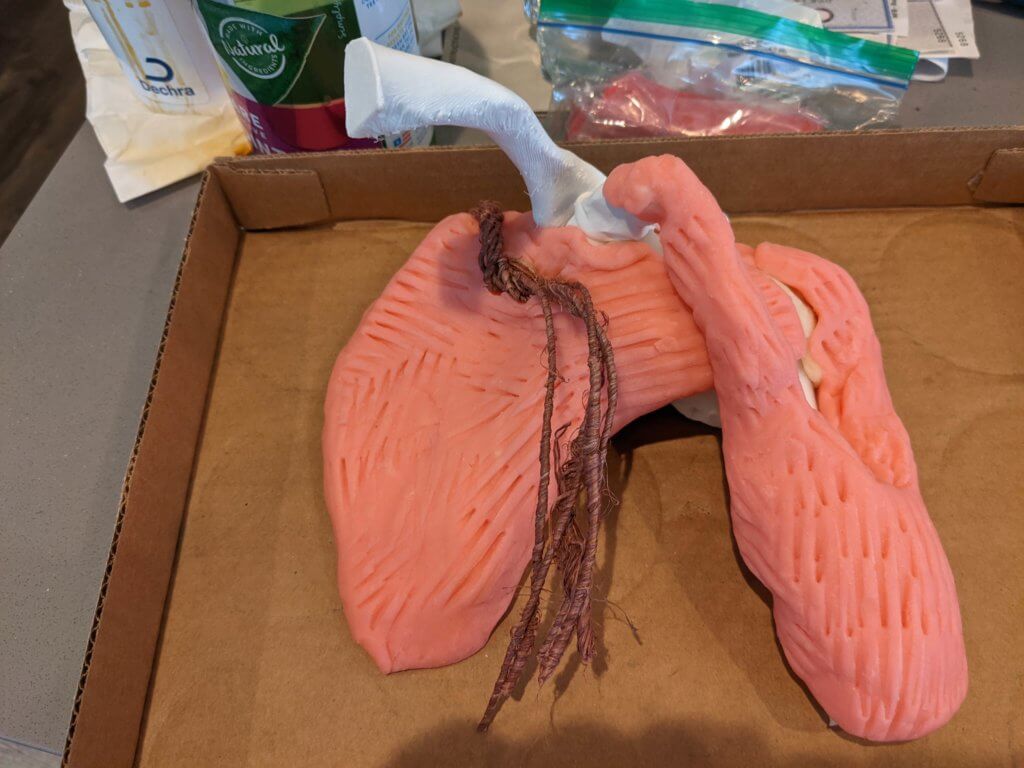
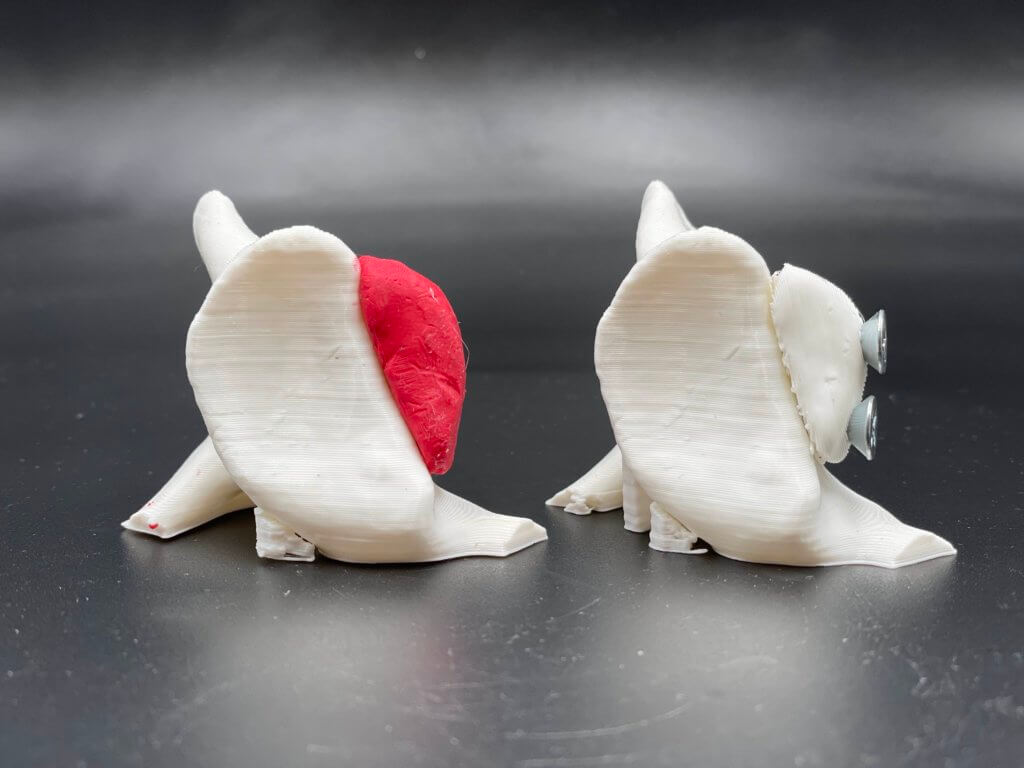
I made the scapula and humeral head of a patient in need of a shoulder surgery called a Latarjet procedure, due to them having recurrent shoulder dislocations. The bony deformity was a perfect example of what happens after chronic shoulder instability. In the surgery we will harvest the patient’s own coracoid process and use that as a graft to help stabilize the shoulder. So, using the 3D printer we made the scapula with the coracoid process already harvested and prepped for surgery. Once I had the 3D printed models of the bones, I got creative with arts and crafts. Homemade playdough was used for muscles. Blue pipe cleaners were used for veins. Metal wires were used for nerves. And modeling clay was used for the shoulder capsule. This part required a lot of work, but it was well worth the time. I’m not the most artistic sculptor, but I think everything turned out well.
Q: Why did you want to make it?
This was going to provide the rest of my staff with a good learning opportunity as to what goes on in a Latarjet procedure and how the surgeon performs the surgery. With a greater understanding of the surgical process, we can better educate the patients on what to expect.
Q: What was your process?
I provided Dylan at the Makers Lab with a CT scan. We talked through what the coracoid graft looks like. With those details he made an exact replica of the scapula and humeral head of the patient. I asked for the coracoid process to be harvested at a 1-inch length and to have two holes drilled through the bone at 1cm apart. This provided me with a “prepped graft” that we could use for the mock surgery. After printing one and seeing if everything went to specifications, we printed an additional 10 models.
Q: What was the hardest part of the process?
On my end, not much of this was difficult. I just had to make sure I provided enough examples and details of what I needed. So, I provided pictures of what a “prepped graft” looks like. And provided exact measurements of where the bone graft needed to be cut and drilled. Once Dylan had those details, he was able to produce great looking models.
Q: What was your favorite part of the process?
How easy and accurate the process was. We really did produce exact 3D printed replicas of the patient’s shoulder based on the CT scan. It’s cool to see and hold the shoulder instead of only looking at the scan through a computer screen.
Q: Why did you make it instead of buying it?
Anatomical models are very expensive. 11 anatomical shoulder models would probably have cost me more than $2000. So, this was much, much cheaper. Afterwards I had to get creative with arts and crafts.
Q: How did this help make you a better athletic trainer?
We’re all able to better educate patients on what to expect with a Latarjet procedure. And we have a better understanding of how hard the surgery is to perform! Surgeons are miracle workers. Performing this procedure on a model was hard. Doing it on a person would be much more challenging.

Q: What do you want to make next?
I’m thinking about making an anatomical knee model. In Ortho we see patients who require a procedure called a “Fulkerson Osteotomy.” These patients suffer from repeated patella/knee cap dislocations. Maybe we can get creative in the Makers Lab and make a knee that requires this surgery.