This week’s maker is Connor Stashko from the UC Berkeley-UCSF Graduate Program in Bioengineering and PhD candidate in the Weaver Lab. Let’s take a look at what Connor made to support his research.
Q: What did you make?
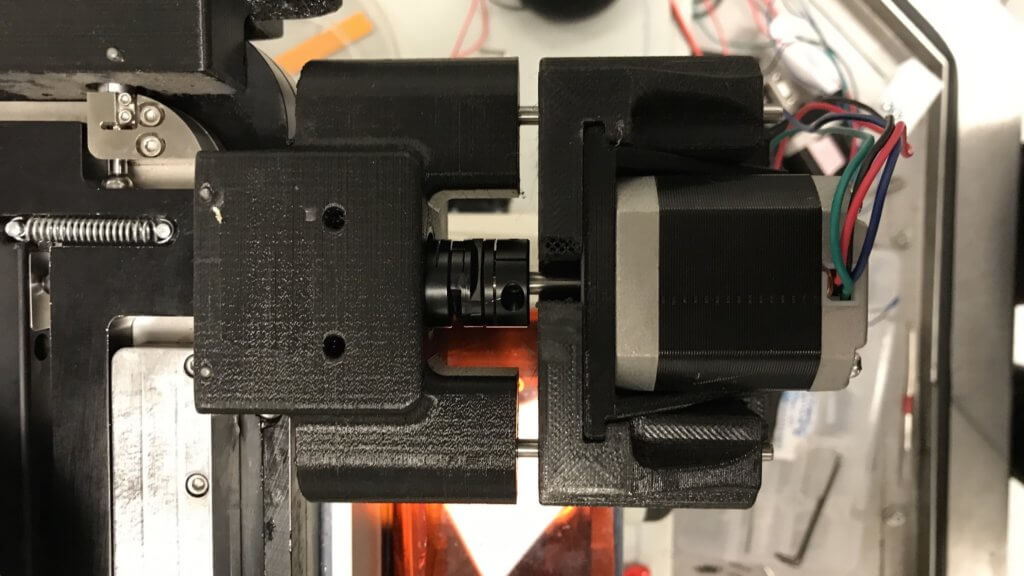
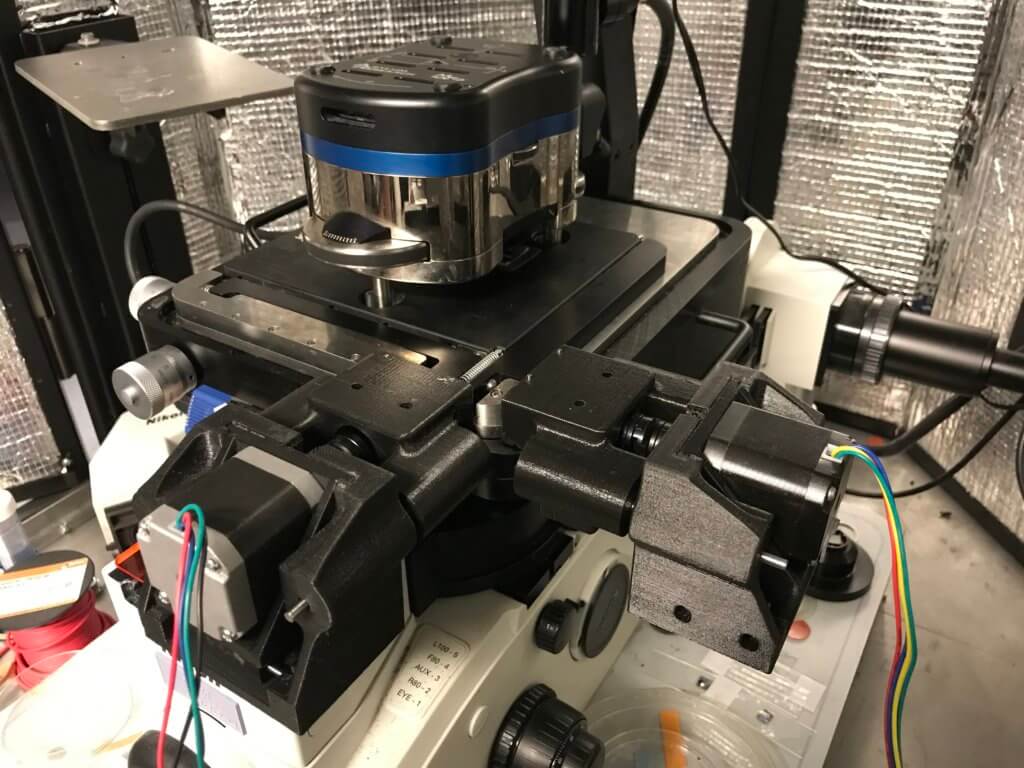
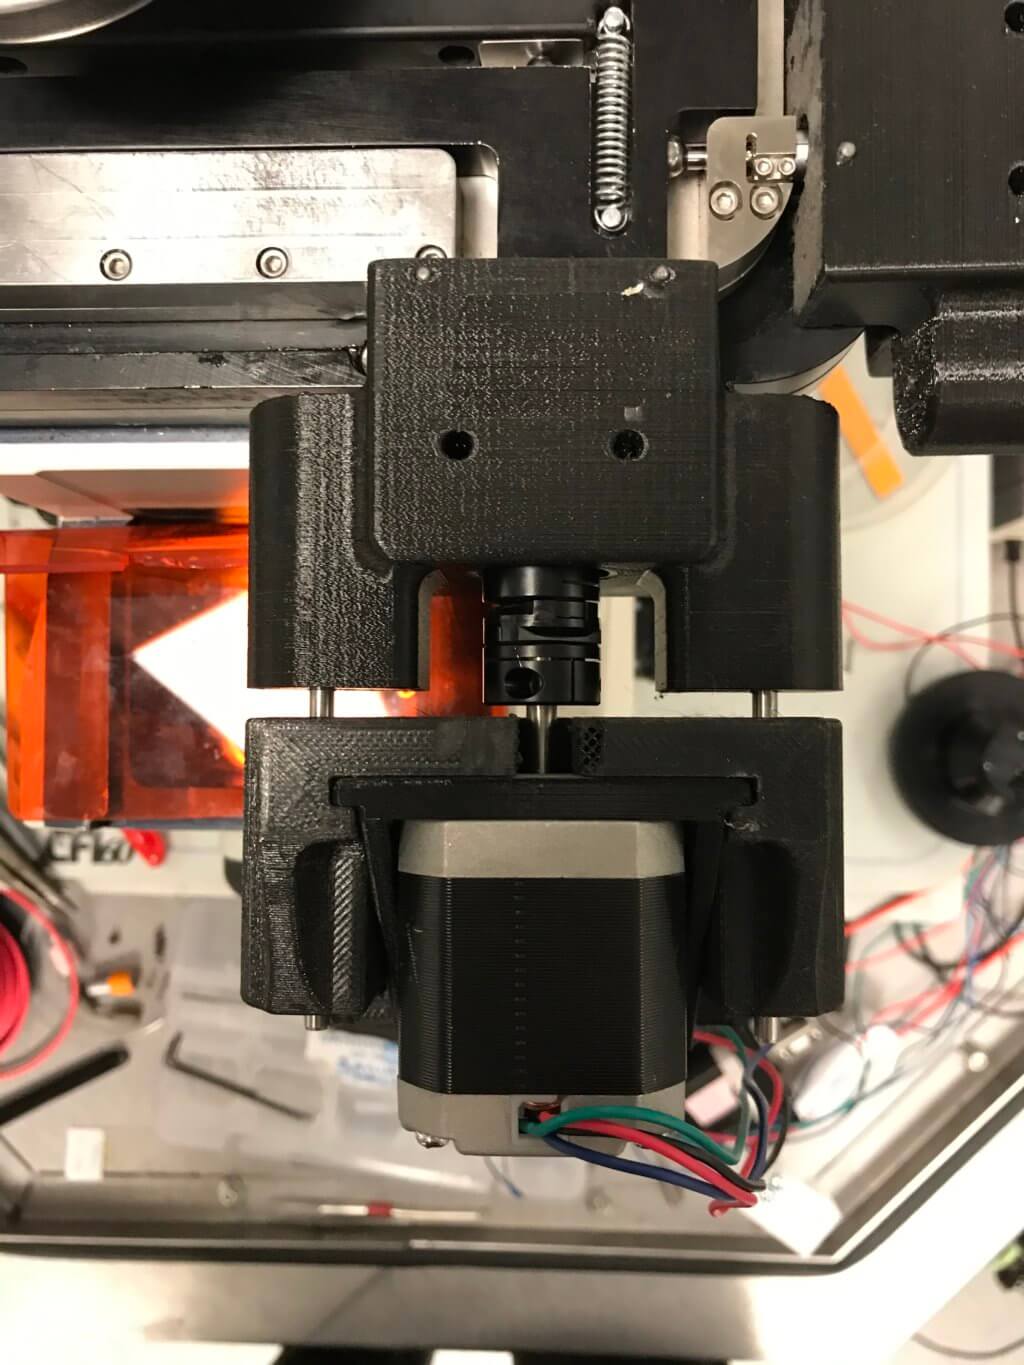
My colleague Neil Pearson and I automated movements of a microscope stage used during Atomic Force Microscopy (AFM) with servo motors and 3D printed parts from the Makers Lab. By implementing a ‘point-and-click’ system, we can now specify movements of our AFM by clicking on a live image in MicroManager where we want to go next.

Q: Why did you want to make it?
AFM is a powerful method for probing the local mechanical environment of a tissue section. However, AFM only collects data over an area of a few microns. It’s a slow and tedious process to move between regions and take images at different points. By automating movements of the AFM stage, we can now move quickly along a tissue and collect much more data than was previously possible.
Q: What was your process?
Most of the initial work on this project involved coding and scripting to get MicroManager to output points specified by the user, then have the motors move the specified amount, then have the AFM software recognize that it was supposed to collect a measurement. Once all of that came together, we then explored different methods for mounting the motors onto the AFM stage and tested out different designs. This involved brainstorming mounting methods, collecting measurements from the AFM stage, rendering designs in SolidWorks, and printing and testing those designs until we got a finished product that met our success criteria.
Q: What was the hardest part of the process?
The coding component of this project was the most challenging. Going in, I had no idea how to write code to communicate with a USB device. Learning communication protocols and figuring out the best way to interface between different pieces of software such as MicroManager and the AFM software was difficult, and not in a fun way.
Q: What was your favorite part of the process?
It was fun going through the design process of testing and iterating prototypes for mounting the motors onto the AFM. 3D printing allowed us to make whatever designs we imagined come to life, making this a creative process as well as a technical one.
Q: Why did you make it instead of buying it?
A fixture for automating movements with this microscope stage isn’t commercially available. If we would’ve made one using only parts we were able to buy online, then it would’ve greatly limited our design. Alternatively, prototyping with machined parts would’ve been a slower, more expensive process, so we would’ve been stuck with what we got. By 3D printing the parts, we were able to quickly and cheaply test out designs and make improvements, leading to a better finished product.
Q: How did this help make you a better researcher?
It was great engineering experience working through a design challenge like this. There are a lot of moving parts in this design; it was valuable experience learning different mechanisms for aligning shafts or sliding two components past one another. More than that, it was empowering to carry a project through from an initial idea to a finished, assembled product. I think this experience will motivate me to try even more complex projects in the future.
Q: What do you want to make next?
I’d like to continue designing fixtures and mechanisms to streamline the wet bench biology work that we do in the lab.