
This is a guest post by Cecilia Im, MD candidate, UCSF School of Medicine
Even with a year of medical school under my belt, CT scans are incredibly hard to read. I can’t even imagine trying to use the scans to educate a patient on the status of their disease with these scans. This summer, I discovered how 3D printing could improve patient education, medical education, surgery planning, and more but the majority of healthcare students don’t know how to utilize this technology. There is also a barrier where students at UCSF don’t realize that they can print for FREE in the Makers Lab in the Parnassus Library!!
I spent this summer as an Education Science Curriculum Development Fellow working with Makers Lab manager, Dylan Romero and Anatomy faculty, Dr. Derek Harmon on creating educational material for how to convert DICOM files like CT scans into 3D printed objects! My journey started as a “one door closed another door opens” story. I applied for summer research funding for another project that was rejected and in the process of trying to find something else to do for the summer, I came across this opportunity. So with this project, I could 3D print a bunch of cool bones from patient scans AND get paid for it?? Sign me up! Plus I got to work on my weak spot — computer programs.
I started with zero knowledge about 3D printing, only a cursory understanding of computers in general. Python? Nah. CT scan software? Of course not.
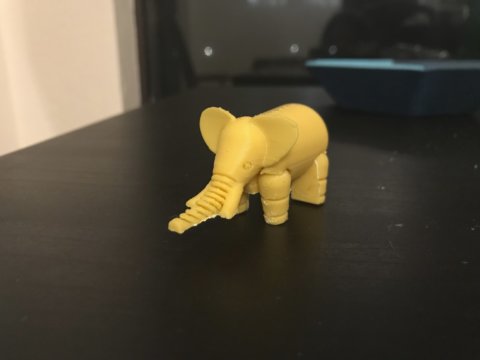
I began this journey with a simple 1 hour print from Thingiverse.com, an elephant with articulating joints!
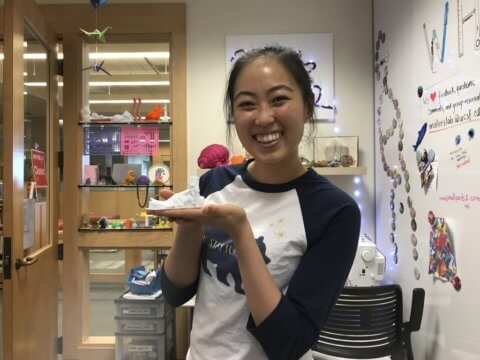
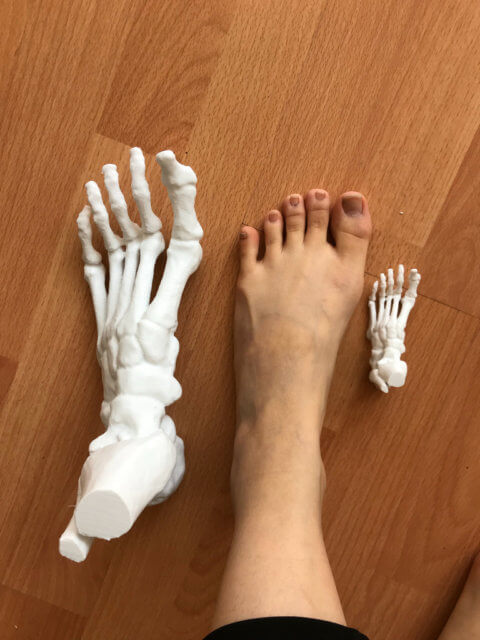
Here I am with my first anatomical print – a foot.
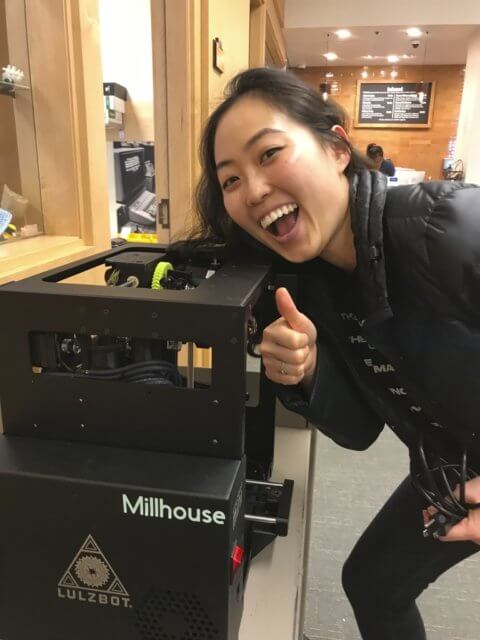
I got to borrow Millhouse, one of the LulzBot Mini printers so I could print overnight at home!
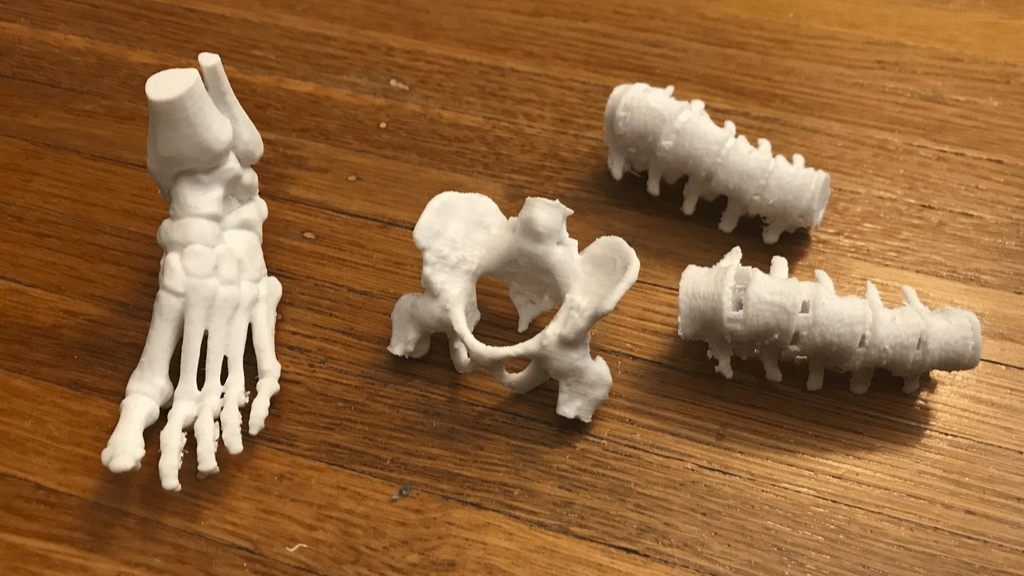
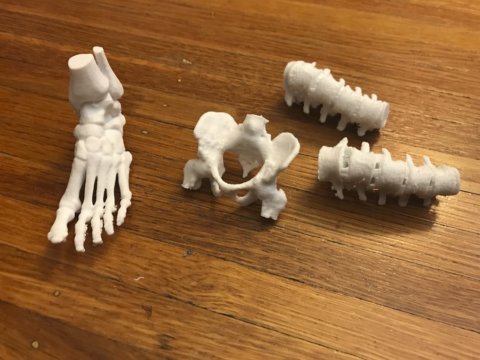
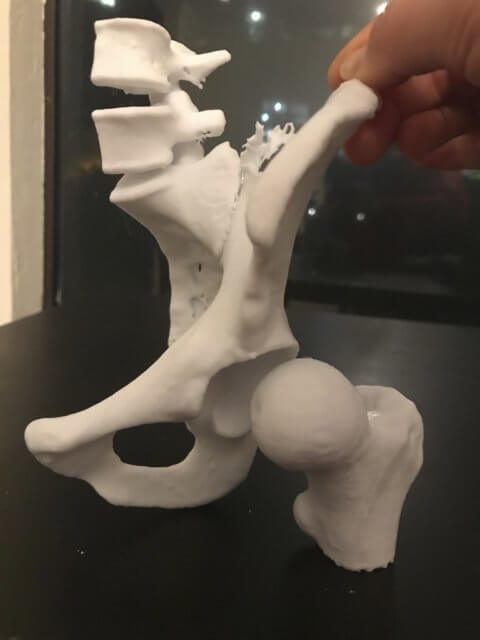
I slowly began printing small things such as this little pelvis and spine.
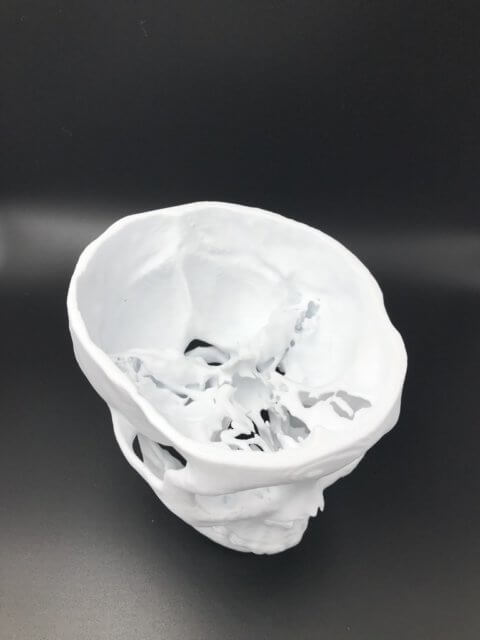
And eventually began printing more complex stuff like a skull where you can see the internal cranial anatomy.
Full scale foot.
And full sized hips.
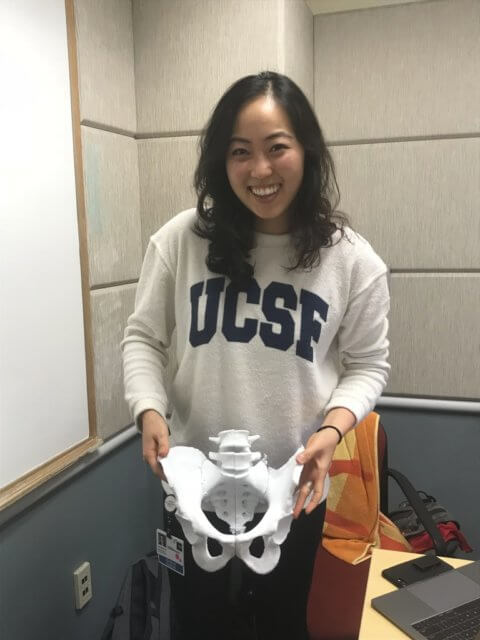
With separate bones that articulate into the hip ball and socket joint!
Here are some things I learned this summer:
- Watch where your hand is when taking prints off of the bed. Slow and steady is the way to go!
- Add half an hour to an hour to the estimated print time because it will always take longer than you think.
- Removing support structure is easier on a bigger print.
- Spatial learning is so much easier when you have the objects at home and can continuously touch and spiral learn.
- There are a so many free and powerful software tools to create, edit, or modify 3D objects (Blender, Meshmixer, etc.).
The hip bones were particularly difficult for me to learn. They are so three dimensional that even with anatomy lab and computer anatomy software, I didn’t feel like I had a great grasp on where all of the bony structures were. Now with these new prints, I can learn them more in depth and continuously review it. I also hope that students and clinicians will be able to use the educational material developed this summer for their patient’s unique physiology!
In the coming months, I will be working with Makers Lab Technician, Jenny Tai and Dylan Romero to create a full skeleton from DICOM files! If you are interested in 3D printing at all, stop by the Makers Lab and hang out. Get started by printing a pre-made object from Thingiverse or the NIH 3D Print Exchange. If you would like to get more information on printing bones from CT scans, take the 3D printing elective or contact the Makers Lab about getting the instructional videos and reader. From there, the possibilities are endless!