Dylan Romero
Dylan Romero
Dylan is the Makers Lab Manager at the UCSF Library. Contact Dylan with general questions about the Makers Lab, curriculum integration, group events, and emerging technologies.

3D Print the Ultimate Business Card

This is a guest post by David Wu, MD-PhD candidate, UCSF Medical Scientist Training Program

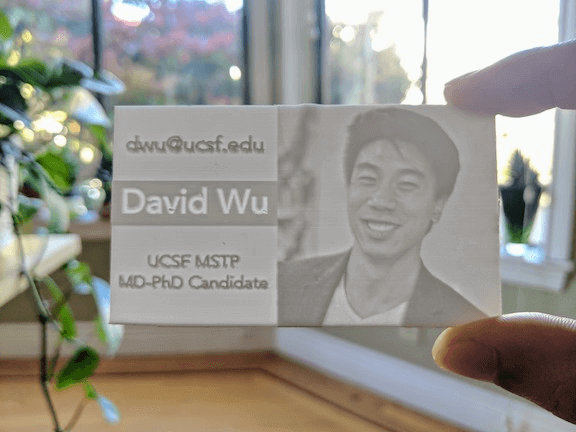
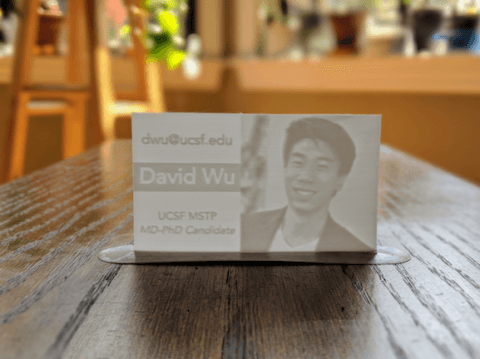
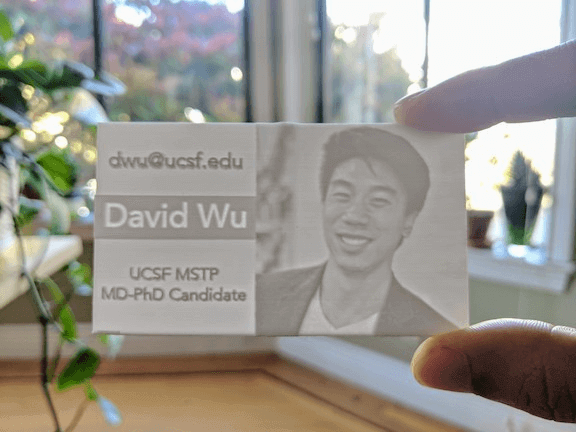
Hey! If this is what you’re here to learn about…

Gif of 3D printed business card

You’re in the right place!

Intro

This is a lithophane. You’d traditionally have to manually carve it from a porcelain or wax plaque. Under normal lighting, it’ll look like a poorly-made relief, if like anything at all. But when backlit, an incredibly detailed image appears!

So how does it work? Essentially, it’s a 3D grayscale image, with darker areas thicker than lighter areas. That’s it! There are no magical materials or tricks. And luckily for those of us with less than perceptible artistic skill, lithophanes are ideally suited for 3D printing. In fact, you can easily learn to do this in less than 30 minutes. Read on, below!

Backstory

The first time I saw a 3D printed lithophane, I was absolutely astonished. There’s the moment – when the image reveals itself – that simply feels like magic.

You can use this technique in many creative ways, from family photo boxes to panoramic lamp shades. But I wanted something I could carry with me – something I could share at a moment’s notice. Hey, why not a business card?

Larger lithophanes are quite fun, but I’ve found people to be surprisingly impressed when I pull out the 3D printed business card. Initially, there’s some polite confusion when they don’t quite understand what it is. But as soon as they hold it up to a light, they are blown away. A professor of mine once stared at it and kept saying, “This is amazing, I don’t even understand how this works!”

Though I independently came to this idea, I’m certainly not the first to 3D print business cards. However, here I present my take and experiments on this concept.

Workflow

Here is the complete workflow for creating the 3D printed business card. All of the software in this guide is free, and you can easily adapt this method for photographs and other images. I’ve written this guide with the Ultimaker 2+ in mind, since we’ve had great success using it for lithophanes at the Makers Lab.

Step 1: Design your business card

Feel free to use professional vector image software such as Adobe Illustrator or Sketch, but to keep things simple (and free), I’ll use Google Slides.

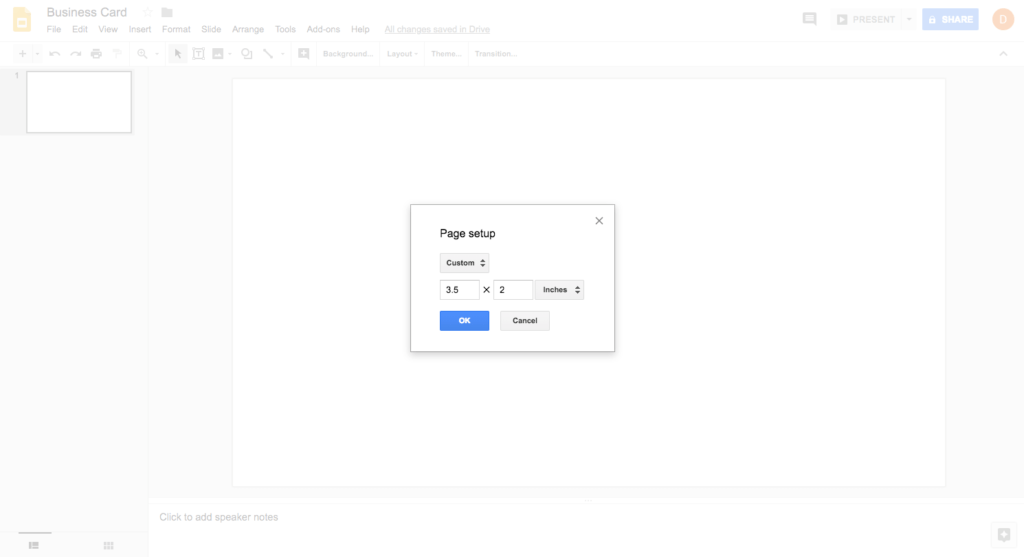
Set up the slide to your desired size (3.5 in x 2 in) under File: Page setup.

Google Slides settings for 3D printed business card

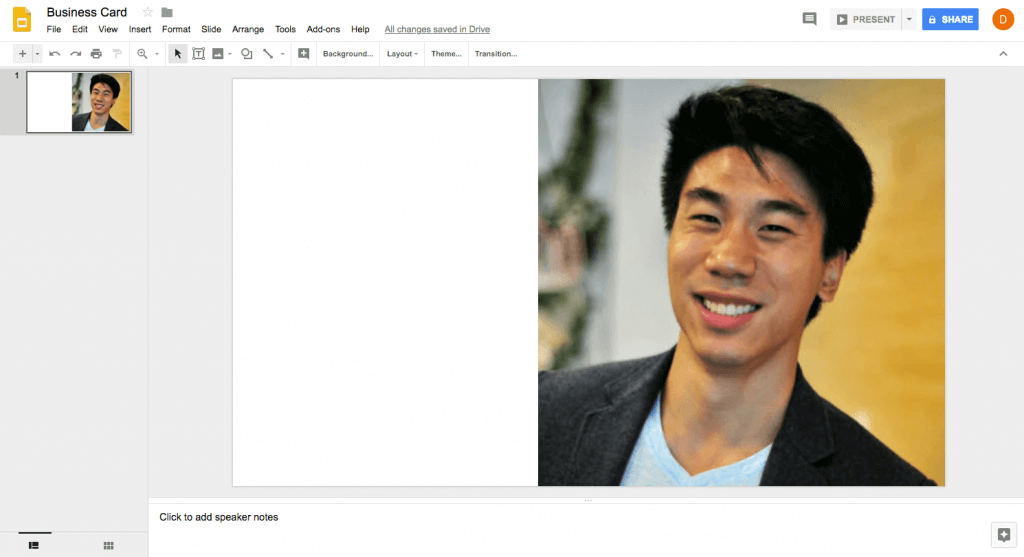
Insert your photo. Since the final card is small, make your image as big as possible!

Google slide layout for 3D printed business card

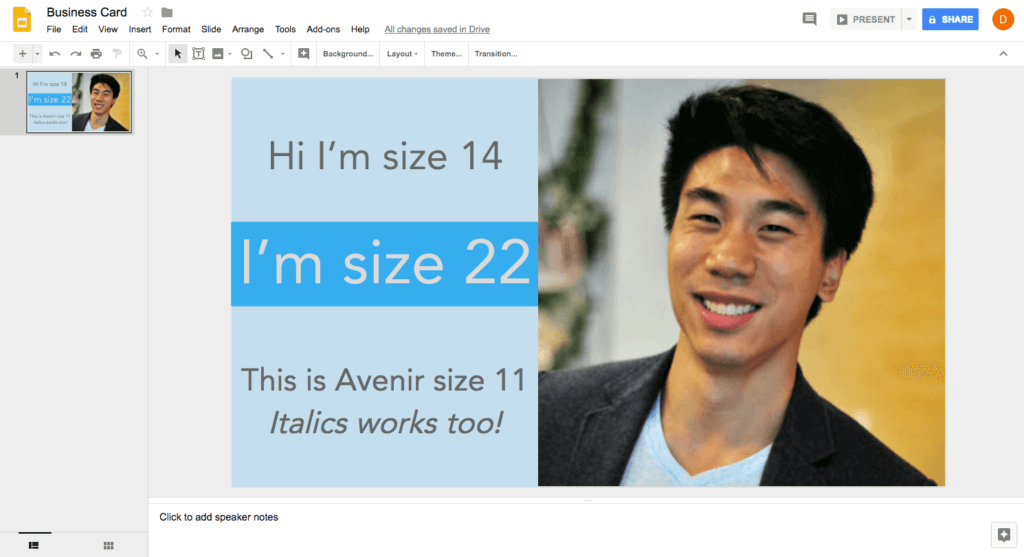
Add some text and background colors. As mentioned above, this is a 3D grayscale image so colors won’t show up in the final print (but see Advanced Tips). I like to add colors so the background isn’t too thin when printed. For related reasons, I typically avoid using black text.

Additionally, if you want the text embossed (raised), make sure the text is darker than its surrounding. If you want it engraved (recessed), add a darker text box around it.

Google slides layout for 3D printed business card

Here are some font sizes, for reference. I’ve also made all my text in bold.
 

Google Slides layout of 3D printed business card

When you’re done, go to File: Download as and select PNG.

Step 2: Convert to a 3D model

There are 2 ways I like to do this.

The super easy way: Open Ultimaker Cura and simply drag and drop your file in. You’ll have a few settings to change.

Here is what I recommend:

Cura settings to convert image

 
Still easy, but with some more options: We’ll use this online tool to convert the image to a 3D model. For some reason these lithophanes turn out nicer than those I load directly into Cura. There are also many options you can play with, like adding curvature and borders.
 
Upload your .png under “Images.” Make these 2 changes:
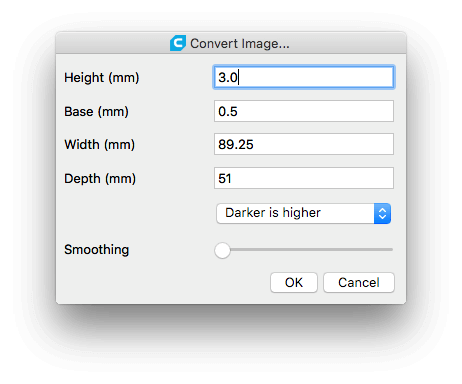
  1. Image Settings: Positive Image
  2. Model Settings: Maximum Size = 89

Refresh the model and download your .stl file. Drag and drop into Ultimaker Cura for the next step.

Step 3: Set up your print

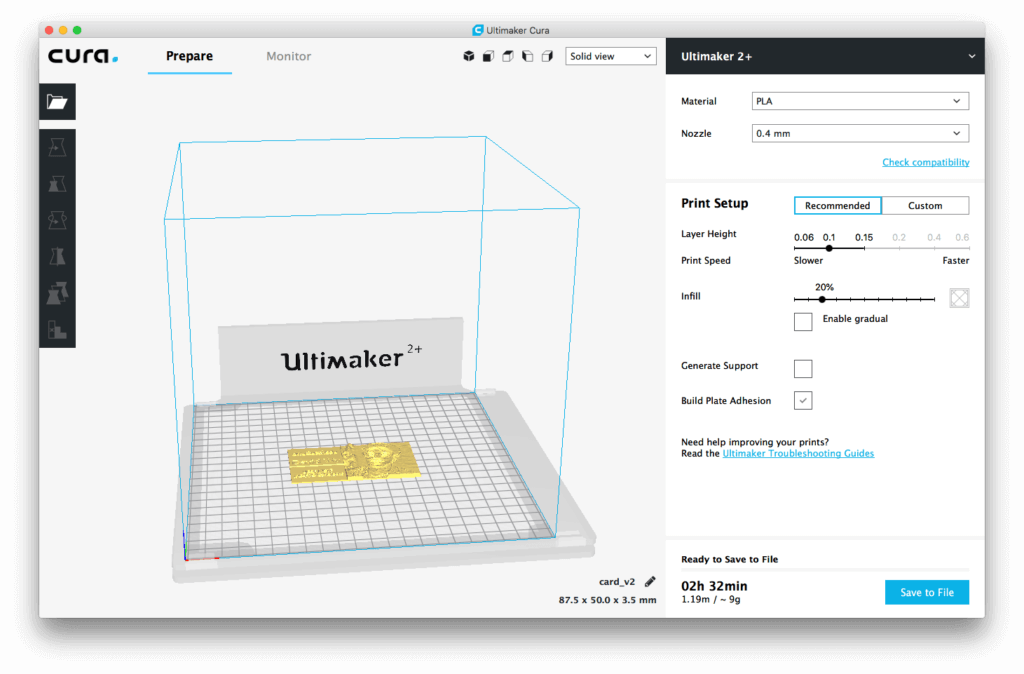
This may be counterintuitive, but lithophanes typically come out much better when you print them standing up rather than laying flat on the build surface. If you don’t believe me, check out the Advanced Tips for the same design printed vertically as well as flat.

Your business card will start out looking like this:

Cura setup

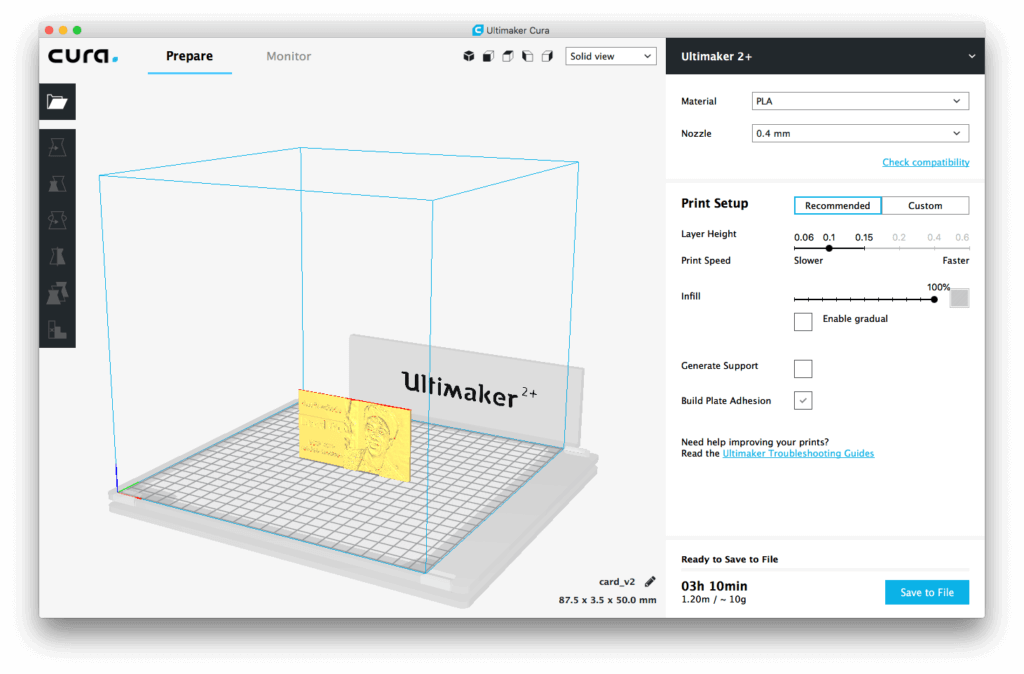
Rotate it 90 degrees to look like this.

Cura setup - rotate 90 degrees

Now, change these settings:

  • Infill: 100% (the print needs to be solid for the 3D grayscale effect to work properly)
  • Build Plate Adhesion: Enable (this will help the card stay put during the print)
  • Layer Height: 0.1 (lower layer height is typically considered “higher quality” and will linearly increase the required print time. I usually go with 100 or 150 micron layers. Check out Advanced Tips for examples of the same file printed at different resolutions)

Some people also recommend these additional settings, though I haven’t thoroughly tested how important these are myself.

Next to Print Setup, select “Custom” rather than “Recommended.” Then use the search box to find these settings:

  • Wall Thickness: 1.75 (basically half the card thickness; should be a multiple of the line width; this ensures your entire lithophane is printed as smooth perimeters and not in an infill pattern)
  • Infill Pattern: Concentric (in case the wall thickness doesn’t cover everything, any infill will be printed match the walls)
  • Outer Wall Speed: 30 mm/s (slow down the speed to get those nice smooth details)
  • Coasting: Enable (might give cleaner prints if you’re seeing some imperfections)

Voilà!

You’re ready to go! Check out Cura’s estimated print time. If you’re doing this here at the UCSF Makers Lab, reserve the Ultimaker 2+ for the amount of time you need (usually around 2 hours – see Advanced Tips for more info). Then print away!

As always, feel free to ask any Makers Lab staff member for help. And finally, please don’t take the steps I’ve outlined here as gospel. I encourage you to experiment with different settings, materials, and workflows. Please let us know if you find out anything so that we can learn too!

Advanced Tips

Converting to Grayscale

You don’t need to convert your design to grayscale, but it can help you visualize how your final lithophane will look. To do this for free, upload to your .png to Google Photos and throw on one of the grayscale filters on (Eiffel, Vogue, or Vista). You can adjust additional settings (brightness, contrast, etc) if you please. When you’re happy, download the edited image and proceed to step 3.

Material

We typically use PLA, though other materials can also work. My main suggestion is to avoid “transparent” materials such as T-glase and even crystal PLA, as the lithophane effect depends entirely on the thickness of the print being directly correlated to the amount of light passing through. Opaque materials such as ABS also don’t work well.

Printer

We get amazing results on the Ultimaker 2+, but I’ve also had success on a number of other printers including the Original Prusa I3 MK3 as well as the Creality CR-10. Some limited attempts on Lulzbot printers haven’t produced great results, but if you find otherwise, please let us know and send us your print settings!

Color

While white PLA is commonly used, in fact you can use all sorts of colors – I’ve used red, yellow, and blue before, which produce nice effects. Dark gray and black don’t work quite as well. Neither do certain infused PLA filaments (e.g. woodfill or metal composites). Milky white tends to work better than a flat white.

Colorizing Lithophanes

If you want a colored lithophane, you can actually achieve this effect by coloring the back with markers. Some say this detracts from the simplicity and beauty of the medium, which I tend to agree with. Though I haven’t had great success doing this myself, I’ve seen some mesmerizing examples online.

Thickness

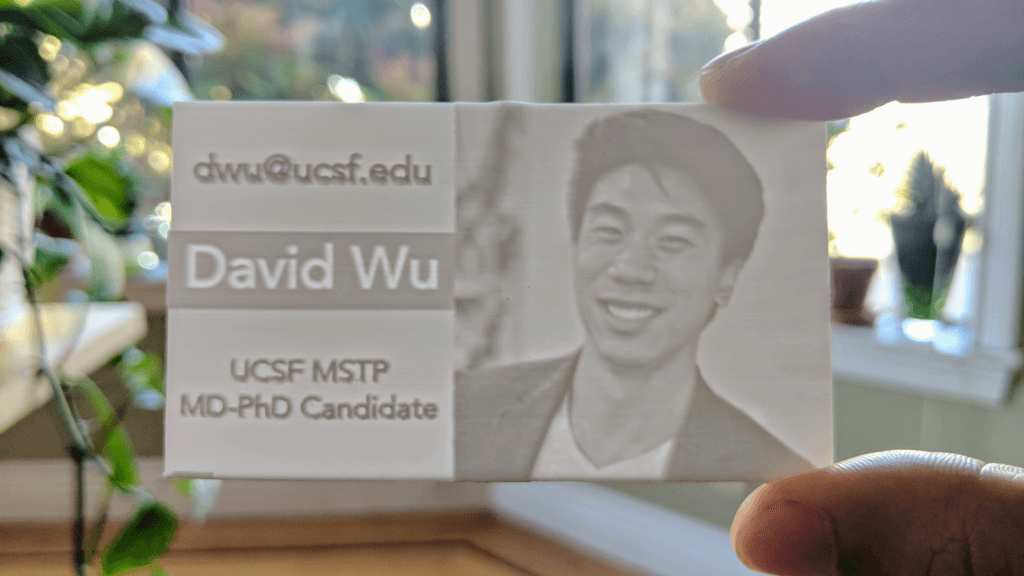
Even with a fat wallet, at 3 mm, you won’t be carrying many business cards! So how thin can we go and still get a nice result? I’ve gotten excellent results with a 2mm total thickness:

3D printed buinsess card with 2mm thickness

Layer Resolution and Printing Orientation

Why are lithophanes typically printed vertically? This has to do with the layer by layer printing process. The idea is that you want as many degrees of contrast in your print as possible for the image to show up well. If you print it flat, it’s easy to figure out how many shades of grayscale you’re going through – it’s simply the thickness (3 mm – 0.5 mm base thickness = 2.5 mm) divided by the layer resolution. So for 100 micron layers, you only get 25 degrees of contrast. However, this only occurs in the Z axis. In XY, the print nozzle is not restricted by the incremental layering process. For the Ultimaker 2+ with its XY positioning accuracy of 12.5 microns, you’d get about 200 degrees of contrast, with the print nozzle smoothly tracing the outline of your lithophane.

Here is the same card, printed in different orientations at different resolutions (hover over image to see settings and print time).

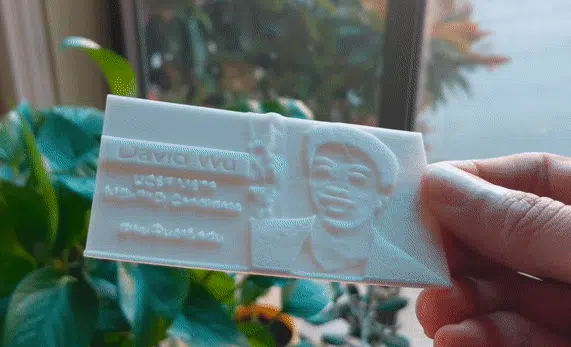
You can see the flat print has a more “topographical” effect, while you if you look closely you can make out the layer lines in the vertical print. If you prefer the topographical effect, by all means go for it.

Here are some more resolutions (hover over image to see settings and print time).

Acknowledgements

Around June 2017, I stumbled upon the Makers Lab at the UCSF Library. With zero background in design and engineering, I came to the “Intro to 3D Printing” workshop. I really need to give a huge shout out to Dylan Romero, who made this creative space possible, and Jenny Tai, the first Makers Lab staff technician. I had never touched or used a 3D printer before and the amazing atmosphere they fostered truly empowered me to learn, tinker, fail, and learn some more. With their help and encouragement, I learned as much about 3D printing as I could and soon how to design my own 3D models.

At one point, I came across a lithophane online, and immediately knew I had to bring back to the Makers Lab to share. And in November 2017, I had my first opportunity to pay things forward by leading a Makers Lab workshop of my own, “3D Print the Ultimate Business Card.” We continue to run this on a regular basis, and you can find the Ultimaker booked constantly, pumping out lithophanes projects of all kinds.

I wouldn’t have had this opportunity today without the help of a huge number of people who continually inspire and empower me. I hope this guide inspires and empowers you, and that you do the same for others.

If you have feedback, questions, or new ideas you’d like to share, please let us know! You can contact the Makers Lab or reach us on @ucsfmakerslab on Twitter or Instagram. We’d love for you to share your thoughts, questions, and prints!

Resources