

While maintaining student engagement over Zoom can be challenging, implementing strategies that use Zoom features in a meaningful way can help engage audiences big or small. For any session, the best Zoom features to employ are ones that make the most sense for the context and goals of your sessions. Keeping that in mind, let’s go through four features within Zoom and how each of them can be used to enhance student engagement!
1. Breakout Rooms
If there is one feature within Zoom that is central to engagement, it’s Breakout Rooms. Especially in large Zoom meetings, the ability to divide-up into smaller groups (2, 3 or even 4 people per room) can mean the difference between a passively involved audience and an audience that is actively thinking about the content and articulating their thoughts.
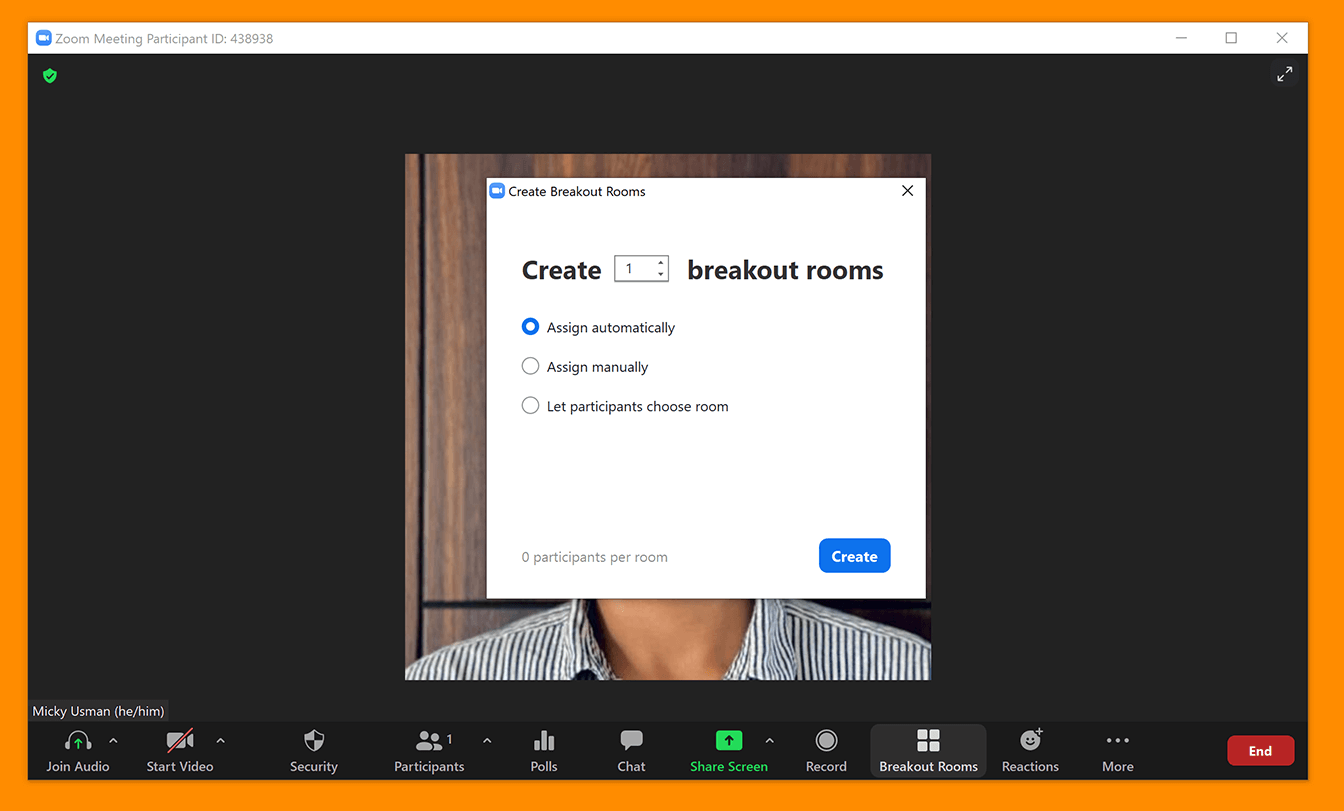
Although implementing breakout rooms can be daunting, having a detailed plan can help ensure things go smoothly.
- Start by thinking about the purpose and duration of the breakout room, and how you’re going to communicate this information to your audience.
- Make sure that you provide clear expectations of what participants are going to be doing during the breakout, while keeping the directions accessible and easy to recall.
- Create a Breakout Room instructions slide and send the students reminders using the Broadcast feature. You can also use shared documents such as Microsoft Word through Office 365 to keep track of each room’s discussion notes and progress in real-time.
- Together with any co-hosts you may have for the session, facilitate discussion and answer questions as needed by jumping between rooms during the breakouts.
TIP: Start early and familiarize yourself with the Zoom breakout room options. The more you utilize the feature, the more intuitive it will become for both you and your students.
2. Reactions
What about engagement within the main room of a session? One simple yet effective feature students can use to participate is Reactions. Reactions in Zoom are short lived emojis that show up on the user’s thumbnail to express an emotion or opinion.
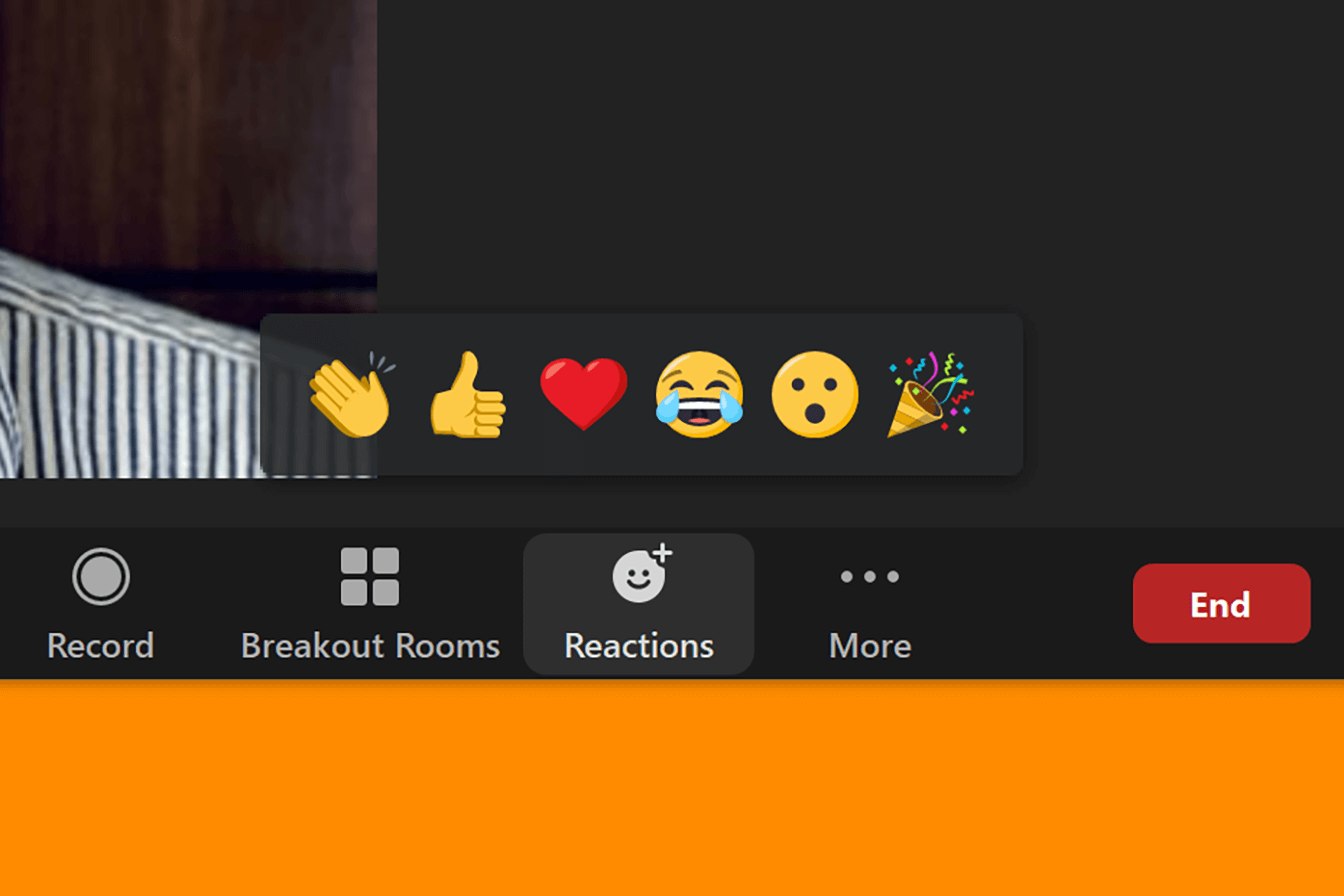
During presentations, you can invite your students to engage with the content by virtually ‘Clapping’ or showing agreement by giving a ‘Thumbs Up’. Although simple, these tools can provide the presenter active feedback, while also giving the audience an additional way to participate.
3. Polls
Polls are a great way of inviting quick and meaningful opinion sharing. Multiple-choice polls can be pre-designed in meeting settings and then easily launched during the Zoom session.
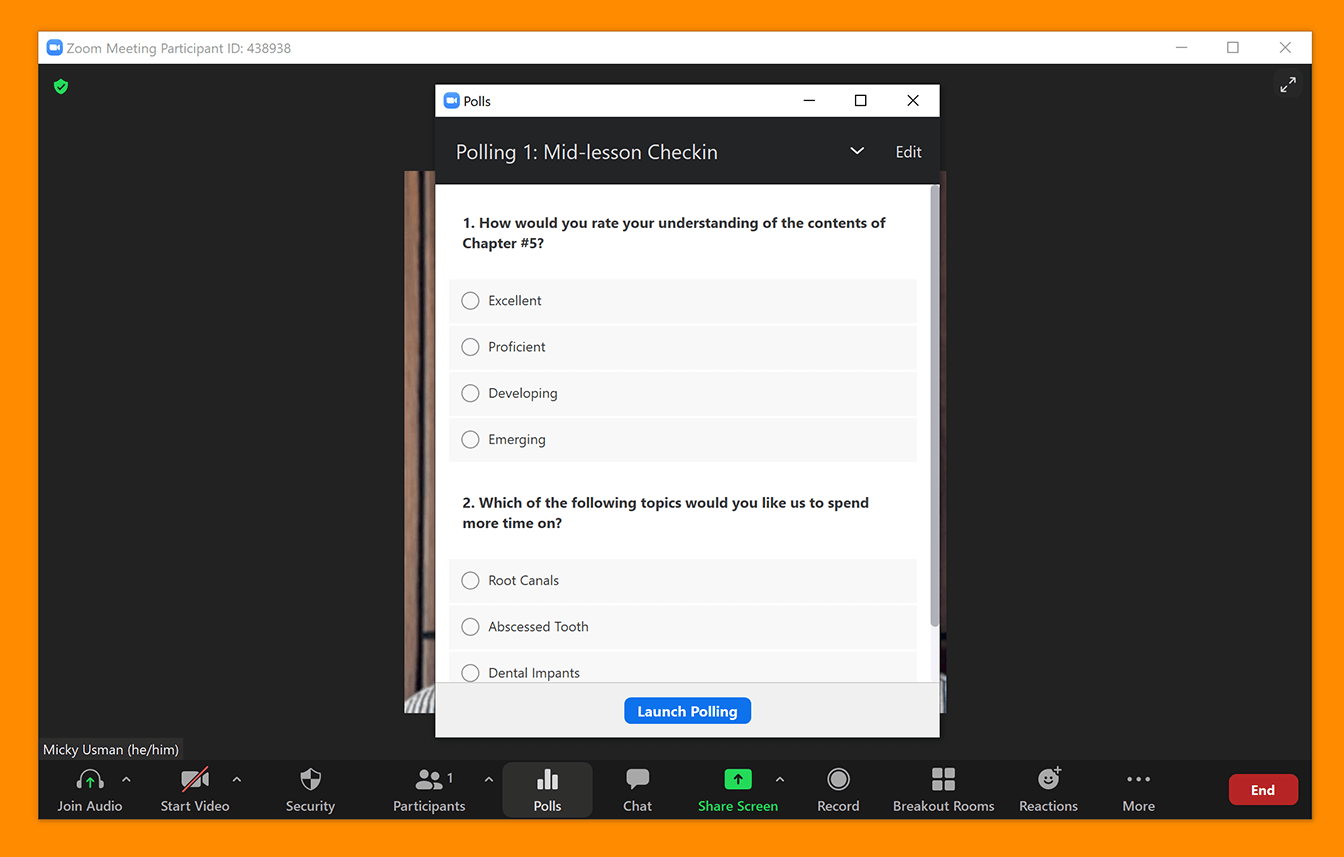
Despite their simplicity, these polls can serve a variety of different purposes. You can create polls that gather feedback about students’ learning experience to guide future instruction or ask questions that gain insight into students’ understanding of a certain topic. After poll responses have been gathered, you can also share the results with the participants to start a discussion and foster a greater sense of community.
Bonus! Looking for more advanced engagement through polls? UCSF offers Poll Everywhere — an online service which includes various polling options such as Word Clouds, Clickable Images, and Open-Ended questions. You can access Poll Everywhere through your MyAccess portal.
No matter what types of polls you implement, giving students the opportunity to demonstrate their understanding or share their opinion is a great way to keep them engaged!
4. Annotations
While illustrating information using paper or whiteboards may not be an option for remote learning, utilizing Annotations in Zoom can help reproduce that experience.
- In order to start annotating, start by sharing a screen.
- If you’re planning to annotate on top of photo or graphic, share the opened image file or PowerPoint slide and annotate using the different options within View Options -> Annotate.
- Looking to start from a blank slate? Choose the Whiteboard share screen option instead.
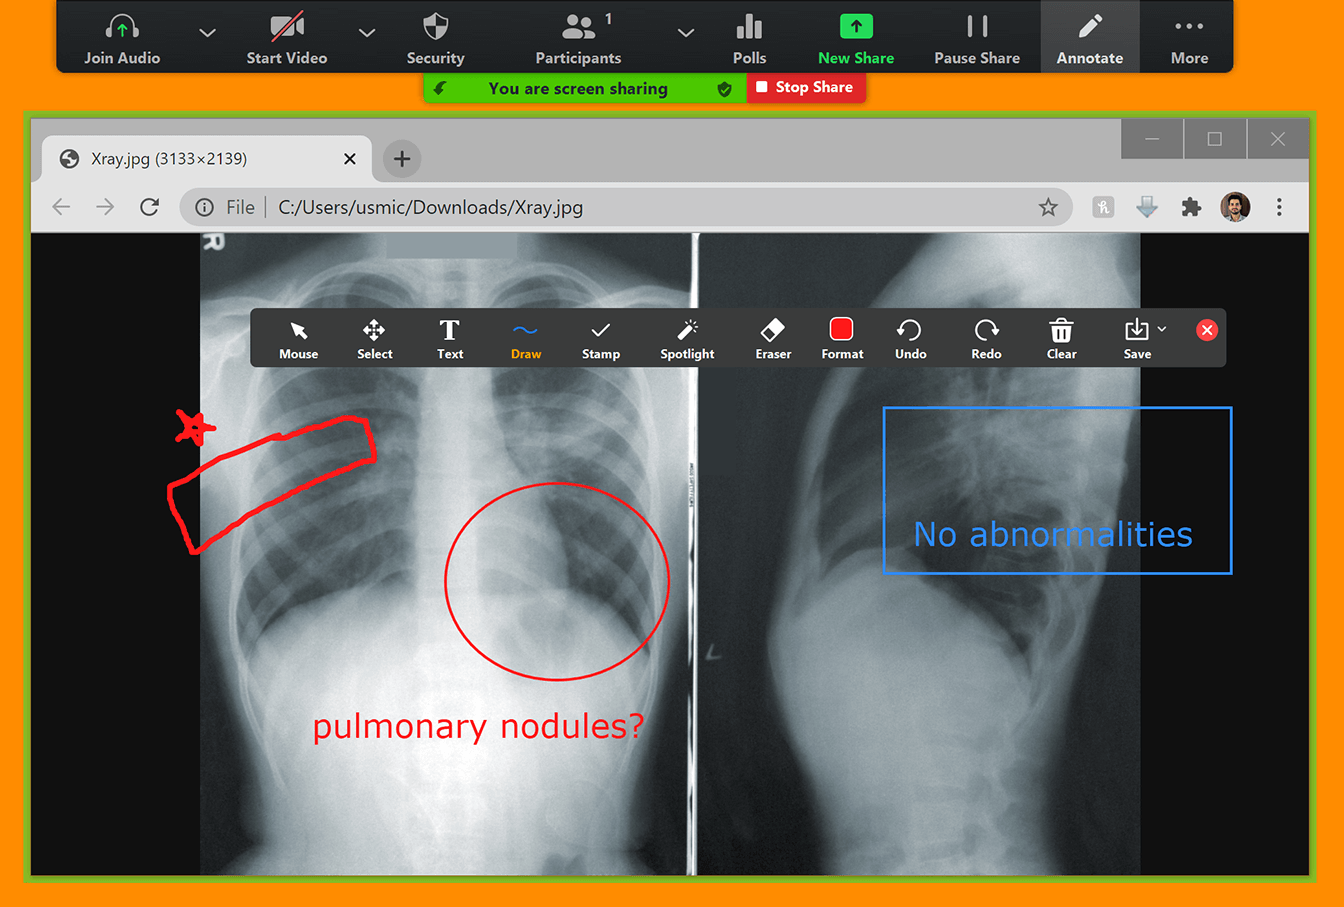
Pointing out different elements using a mouse is relatively smooth through Zoom annotations. However, when it comes drawing diagrams or writing detailed notes, you may benefit from a stylus input using a touch-screen device or pen tablet. Visit the Multimedia Hardware and Software page to learn more.
TIP: Did you know multiple participants can annotate at the same time? By creating opportunities for students to meaningfully annotate together, you can create engaging experiences for multiple students at the same time. When appropriate, utilize collaborative annotation to facilitate brainstorming sessions, labeling, or even team presentations.
Getting Help
Finding the right engagement strategies for your Zoom sessions often involves some trial and error, but you don’t have to go through it alone! Creating a culture of feedback within your learning community can help you iterate through different approaches and find the ones that works best for your students. Overall, providing students choices during the learning process and designing sessions with the student experience as the central focus is often a recipe for great engagement.
Additionally, UCSF Library has a team of instructional designers available to help enhance remote teaching experiences. Visit the UCSF Library’s Instructional Design page to learn more.