
This week’s maker is Litty John, MBBS, assistant professor in the UCSF Department of Anesthesia and Perioperative Care. Let’s take a closer look at her project.
Q: What did you make?
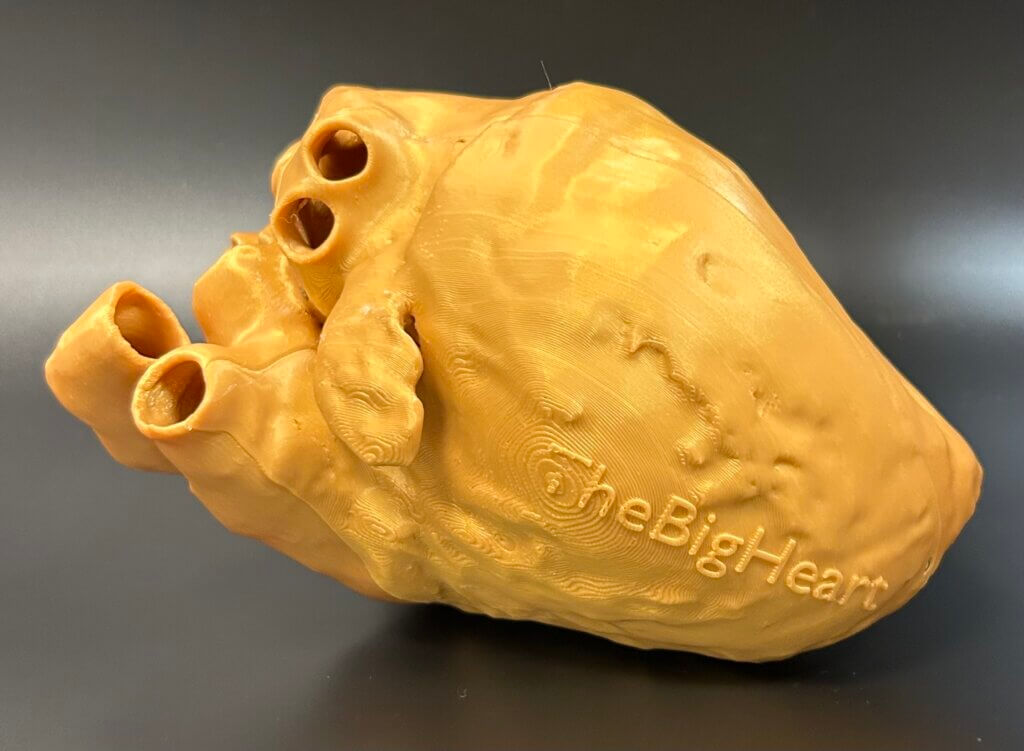
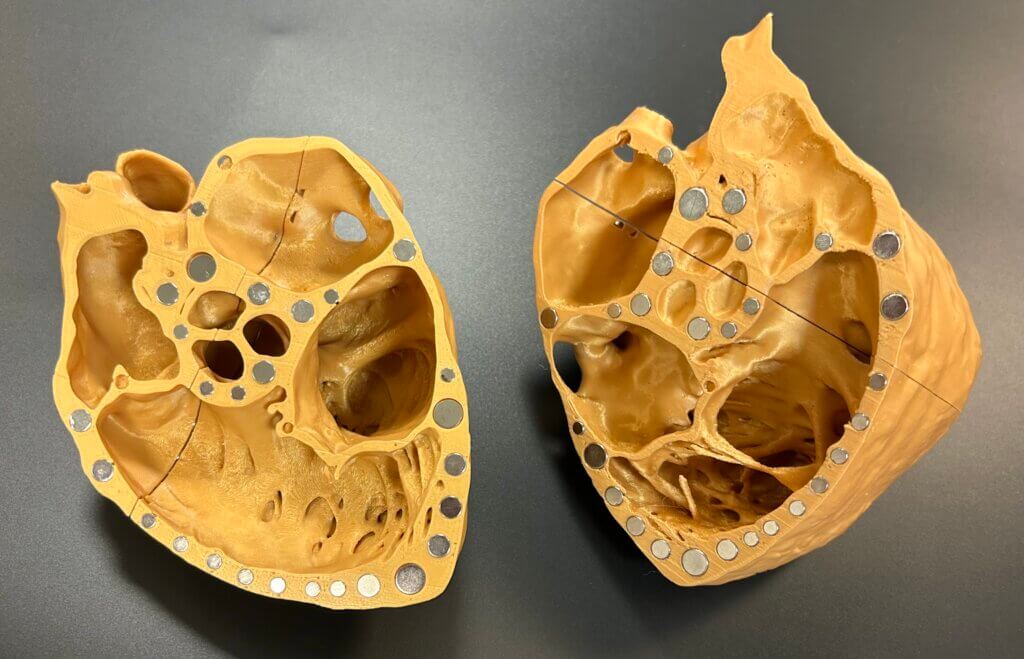
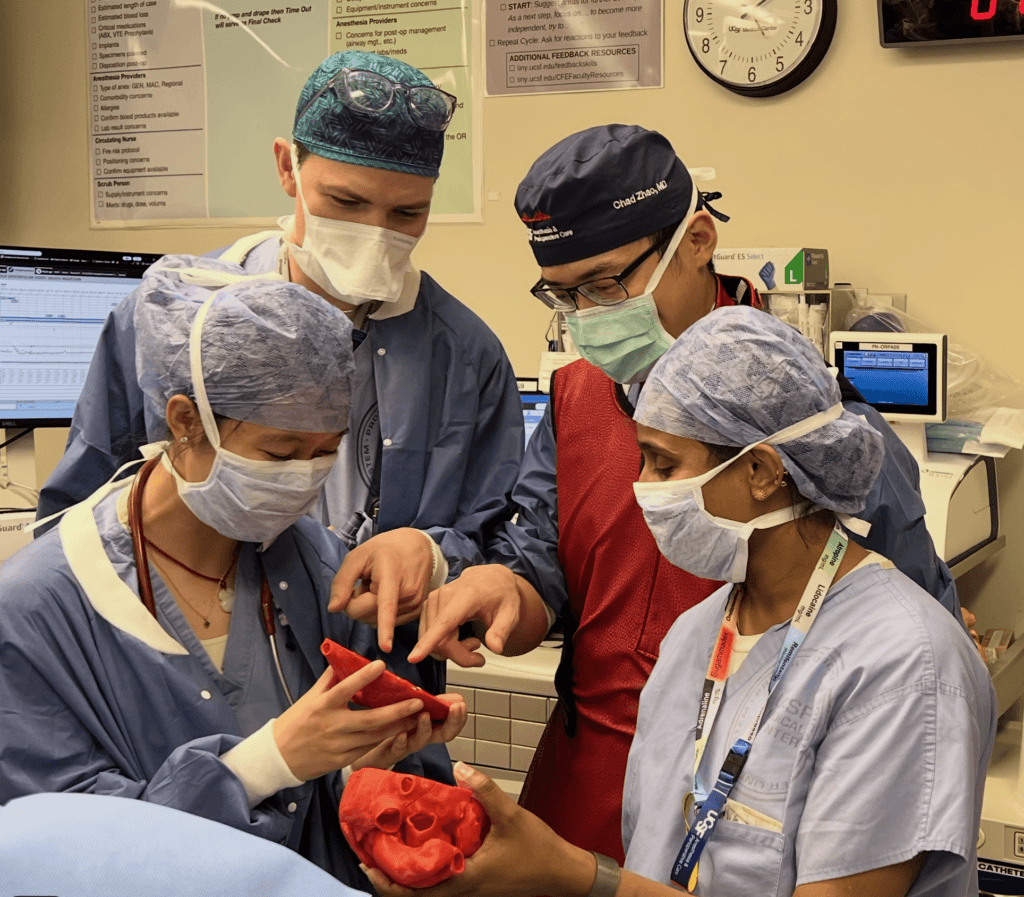
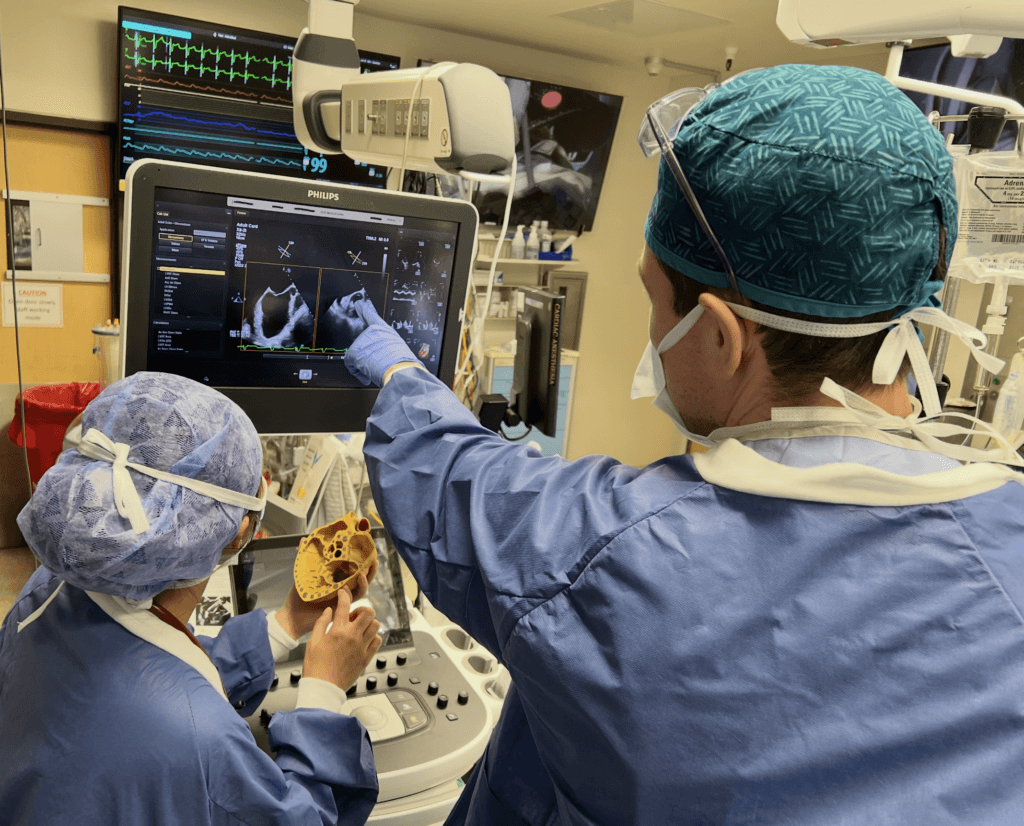
We developed 3D-printed heart models for educational use. Each model displays three of the most commonly utilized TEE (transesophageal echocardiography) imaging views.
Q: Why did you want to make it?
The heart is a complex 3D structure that trainees often struggle to understand on ultrasound. As someone who teaches echocardiography, I see this challenge firsthand. An anatomically accurate model that can be opened physically, and according to multiple standard echocardiographic views, helps learners better understand the spatial relationship within the heart. Similar models helped me when I was a resident, and I wanted to provide the same benefit to our trainees.

Q: What was your process?
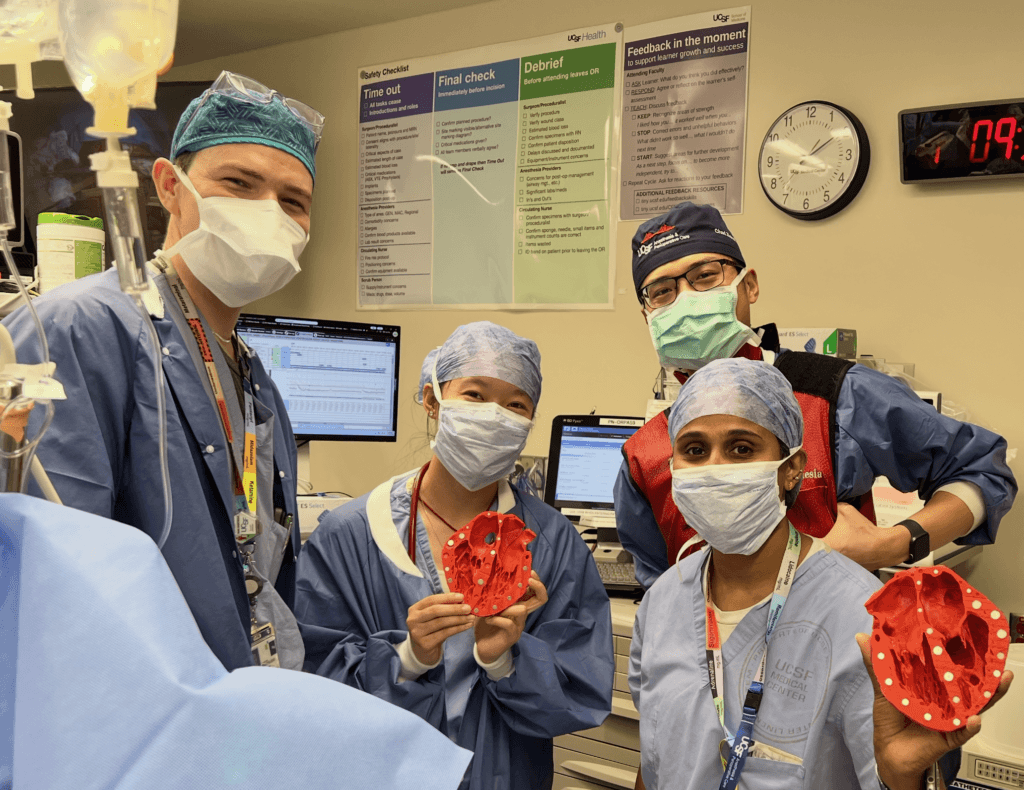
We used freely available high-resolution CT (computed tomography) scan datasets from the University of Minnesota’s Visible Heart Lab to 3D-print anatomically accurate heart models at the UCSF Makers Lab. Multiple TEE views were combined into a single model using Blender, an open-source 3D modeling software, and separated into sections designed to be held together by neodymium magnets. We primarily use these models as teaching tools for echocardiography. The models are also used in the cardiac operating room to help pinpoint the location of specific cardiac lesions based on live echocardiography findings, which assists surgeons prior to heart surgery.

Q: What was the hardest part of the process?
At UCSF, we are fortunate to have many resources available. The challenge was identifying the right resources and connecting with the appropriate experts. Coordinating across departments and leveraging institutional support effectively required initiative and collaboration.
Q: What was your favorite part of the process?
Testing the final product with my students was the most rewarding part. Seeing the spark in their eyes when they finally grasp a concept that previously felt overwhelming is incredibly fulfilling. In those moments, I feel that we have truly accomplished our goal as educators.
Q: How did this help make you a better faculty?
This project reinforced my commitment to meaningful, high-impact teaching. When trainees grasp concepts in a spatial and tactile way, the learning is deeper and more lasting. It becomes easier for them to build on that foundation as they advance in their training.
Q: What do you want to make next?
We are currently developing airway models for bronchoscopy training. Commercially available mannequins are often expensive, so we are developing low-cost, high-quality alternatives that can be widely accessible to trainees. Additionally, we are creating educational tools to help trainees practice ultrasound-guided needle placement and improve hand–eye coordination for ultrasound-guided procedures in anesthesiology residency programs.
Acknowledgement by Litty John
I would like to express my sincere gratitude to our Chair, Michael Gropper, MD, PhD, for his unwavering support and funding of this project. From the very beginning, he believed in our vision, trusted us to see it through, and backed us without hesitation. His confidence in our team provided the foundation that allowed this project to move forward and ultimately become a reality.